My recent post about my dovetailed bed frame has drawn quite a bit of interest including requests for images of the finished project and a request for a bed in California King-size. The strangest part was how Google treated it. Tailspin Tools now ranks pretty high for the search term “dovetailed bed frame” and is #1 in the image pack as of this writing.
I thought I’d circle back now that it’s complete to share the final product and to focus on being able to join long boards with dovetails that are too unwieldy for the traditional transfer. In the case of my bed, my shop’s ceiling was a very real barrier to attempting it, even if I could have worked out how to hold the parts together. My next post will show a three-step series process of start to finish.
While I had been planning to build a new bed for quite a while and had the basic construct rattling around in my head, the ultimate form it took was dictated by the materials I chose, or that sort of chose me. I’ll explain.

In 2019, blissfully unaware that the world was about to implode, I was on an annual trip into the Adirondack Park’s high peaks region, always the highlight of Fall for us. I stopped every year at Blue Line Hardwoods in Long Lake to cherry pick from their yard but sadly they had closed. Later in the trip we stopped at Elk Lake Lodge to visit with our friend, manager Mike Sheridan. When I told him about Blue Line he said “let’s go for a ride” and drove us to the on-site lumber mill. They had taken down some MONSTER white pines, some logs were too big to load onto the bandsaw mill. He gave me a board 16” wide x3” thick x13’ long. I decided on the spot it would become the bed. I had stayed at Elk Lake many times and being gifted that lumber felt pretty special.
While I was developing the TailSpin dovetail markers I had always thought that there would be a big advantage working with larger pieces of timber because of not having to transfer marks and this would be the test. I searched online for dovetailed bed frames and came up dry, with the exception of a couple of timber framed rustic pieces.

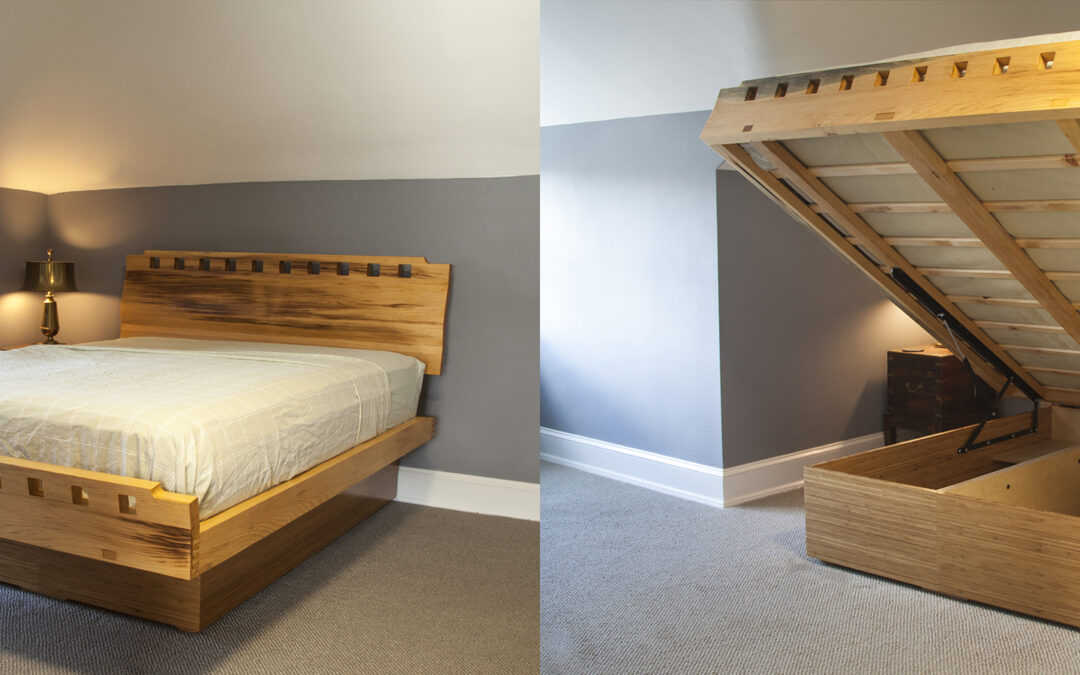
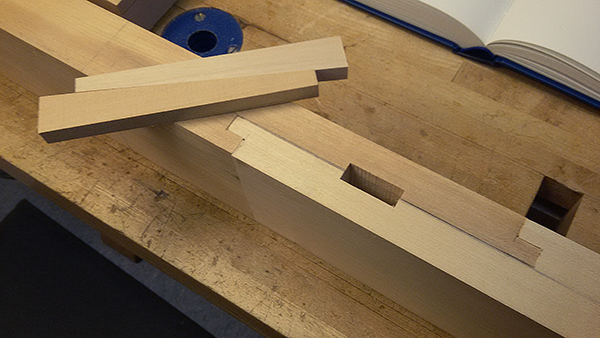
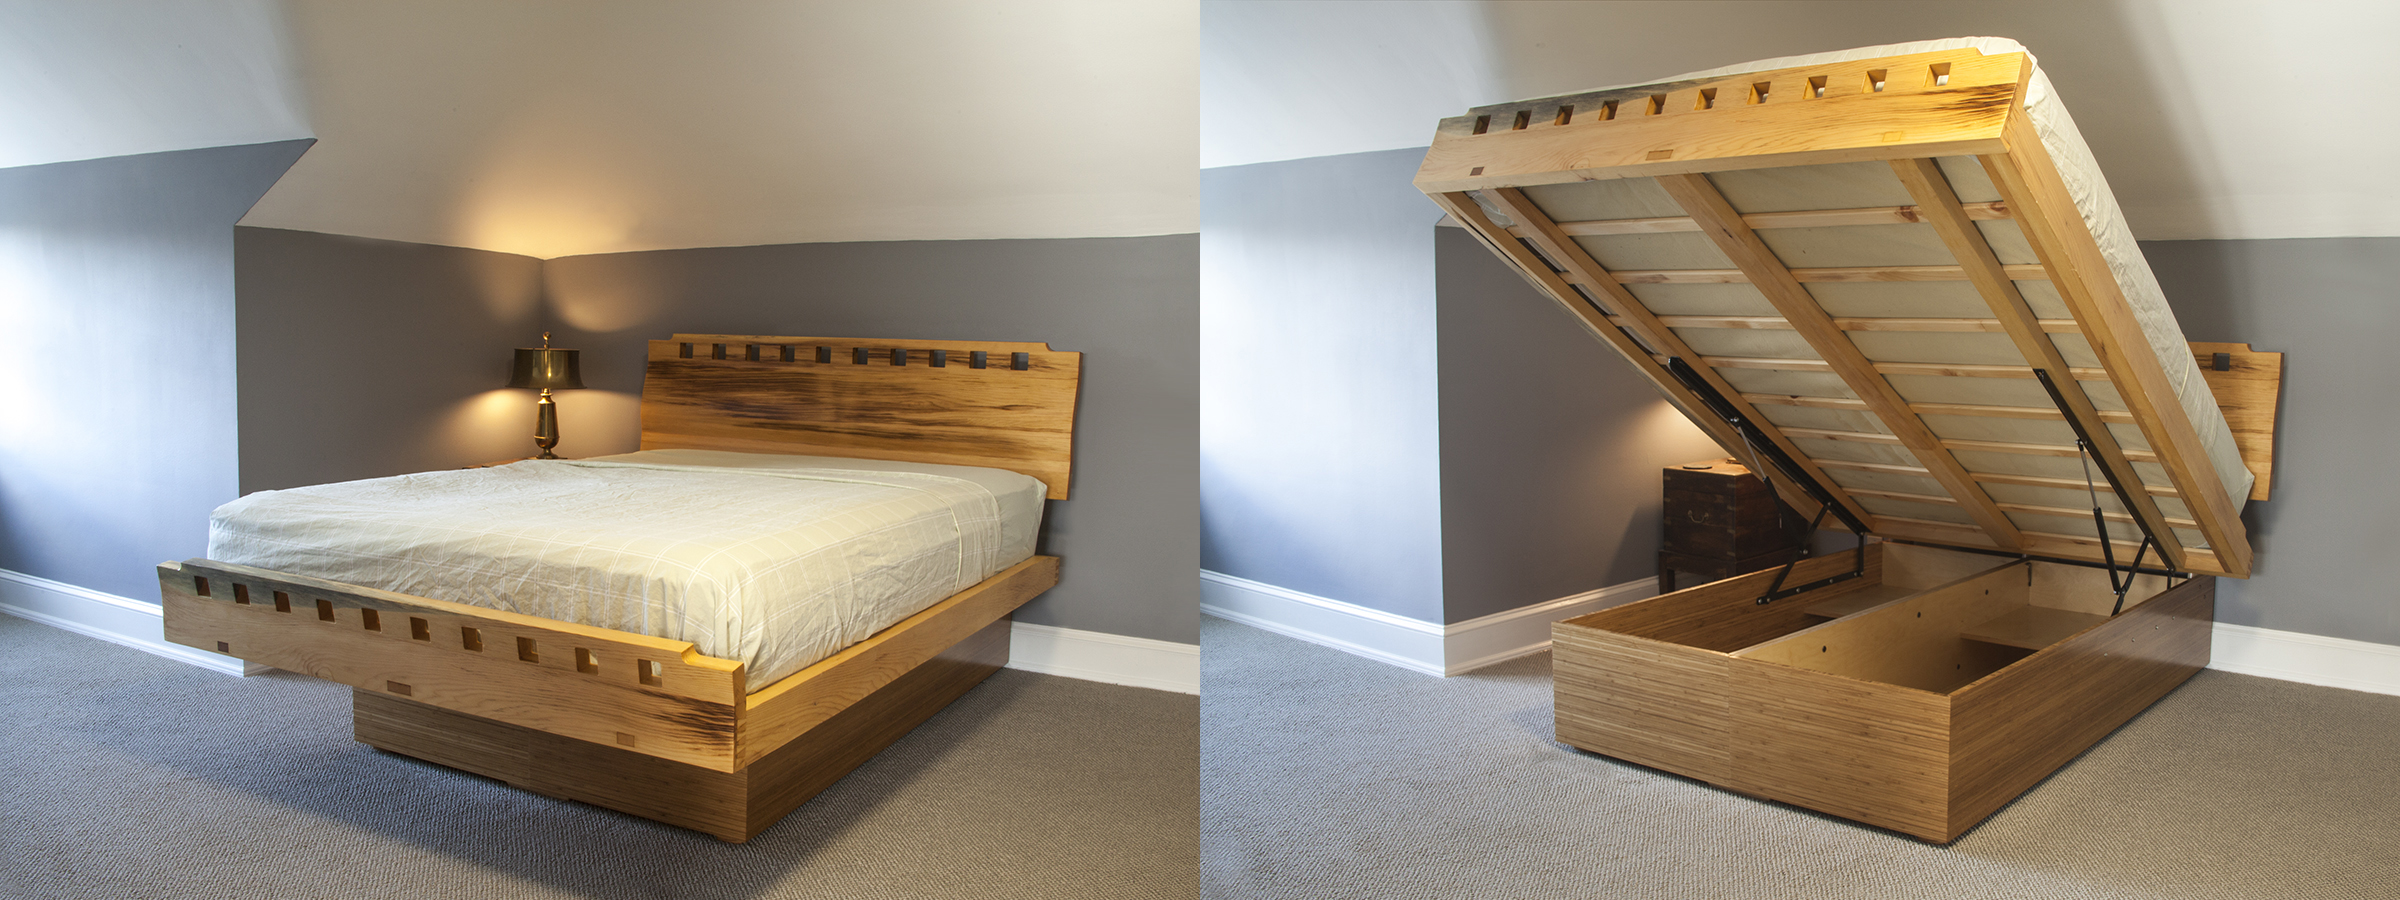
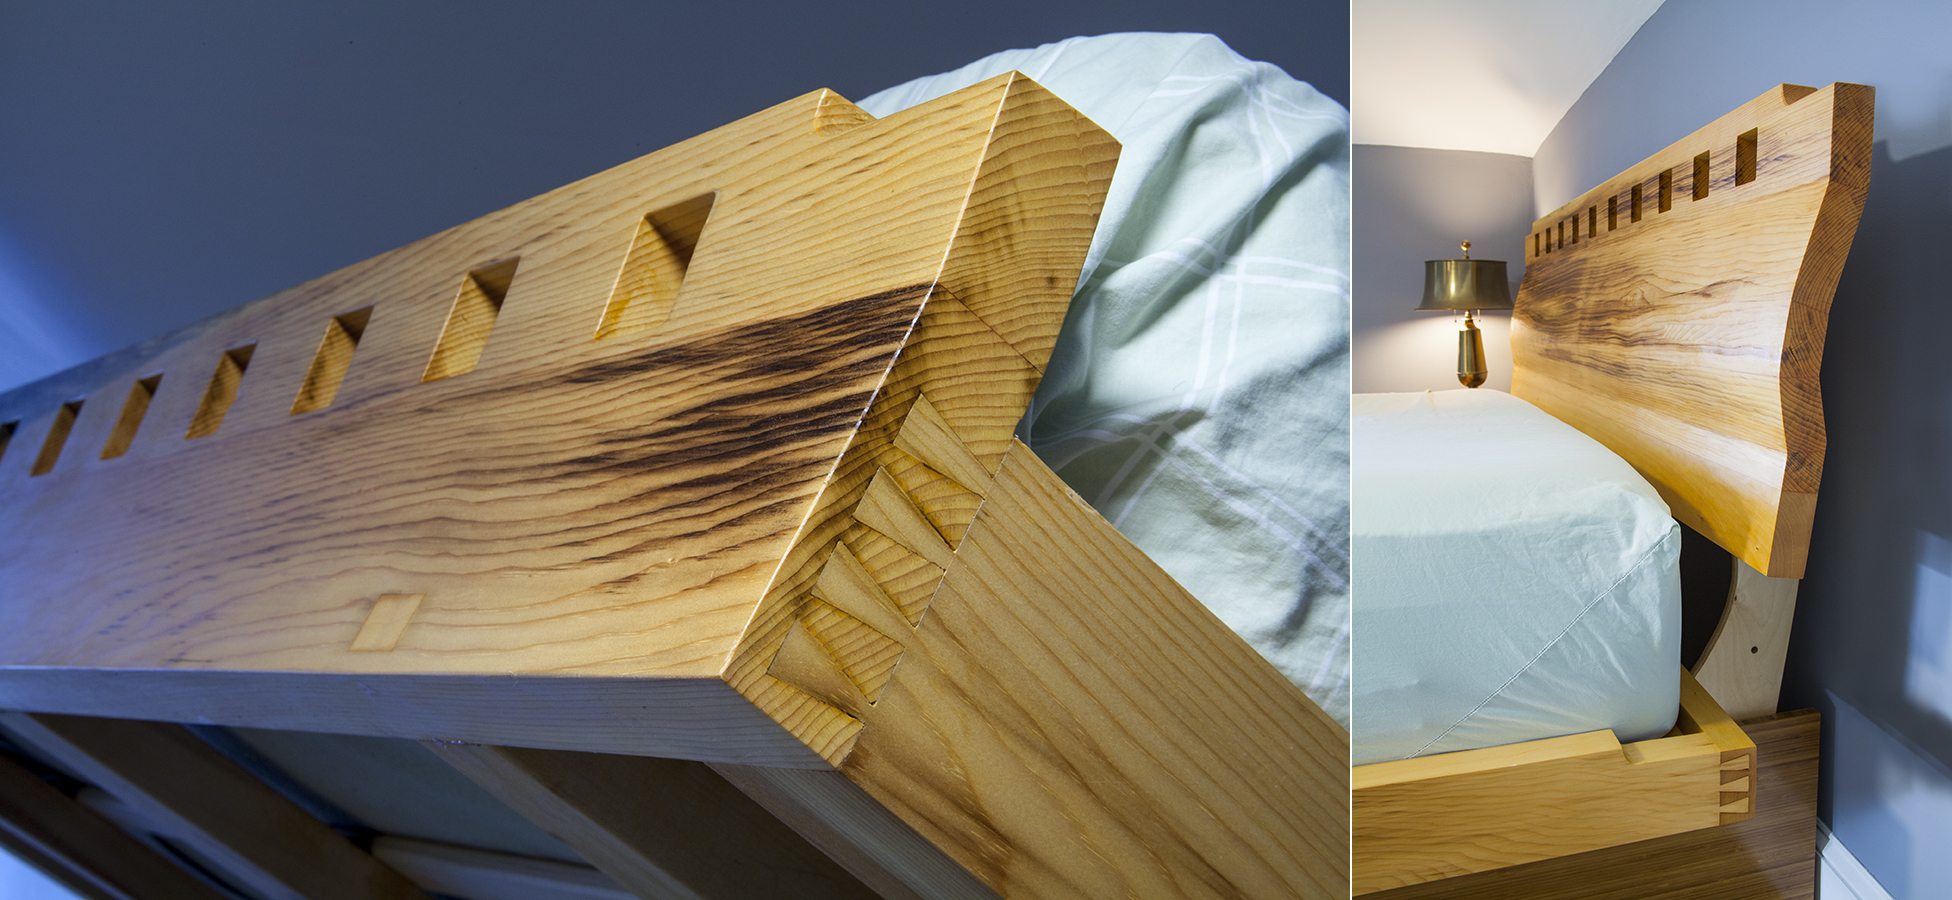
I thought it would be a challenge, but beyond having the boards in my vice at an angle (and standing on a bucket) the marking out went like any other dovetail project using TailSpin… smooth and easy. You can look at the photos in the original blog post here to see the steps. I made the frame with half blind dovetails, and coopered the headboard to make sitting up to read in bed super comfortable. EVERY headboard should come with lumbar support!
I put the wood in the garage for 6 months (it had been air-drying in the yard for a year) then cut it to 7’ and 6’ pieces and moved it into the shop for another 6. Making up the cut list was scary. I had just enough material for queen-size head and footboards in the coopered form I had drawn up. There was some black and blue staining that I decided to embrace rather than try to work around. The side rails came out of the ADK board while the rest of the frame was made with reclaimed spruce that had been part of an office interior on West 36th Street in NYC that I had in storage for over 10 years. I had to break out the board stretcher to finish the frame without a lumber run.
I had the head and footboards finished during the zombie summer of 2020 and ran into an issue that stopped the project for 8 months. It was impossible to get my preferred materials for the base of the bed because of supply chain problems from NYC to China. I had decided early on that the bed would have a storage capability and bought pneumatic hardware from Selby Furniture Hardware in 2020. The base of the bed would be 2 large boxes that would be sized to swallow all of our ski and snowboard gear. I chose bamboo plywood from Plyboo for the boxes’ show faces (from China) and Baltic-birch for the rest. Neither could be had until a supplier in the Bronx gave me a call as I revisited the project in August of 2021. There was a truck on the way and it was mostly pre-sold. If I was there when the truck pulled up I could have the few sheets I needed. I drove to the yard. 2 hours (and some sticker shock) later I was loaded up and back in the bed business. The prices had more than doubled!
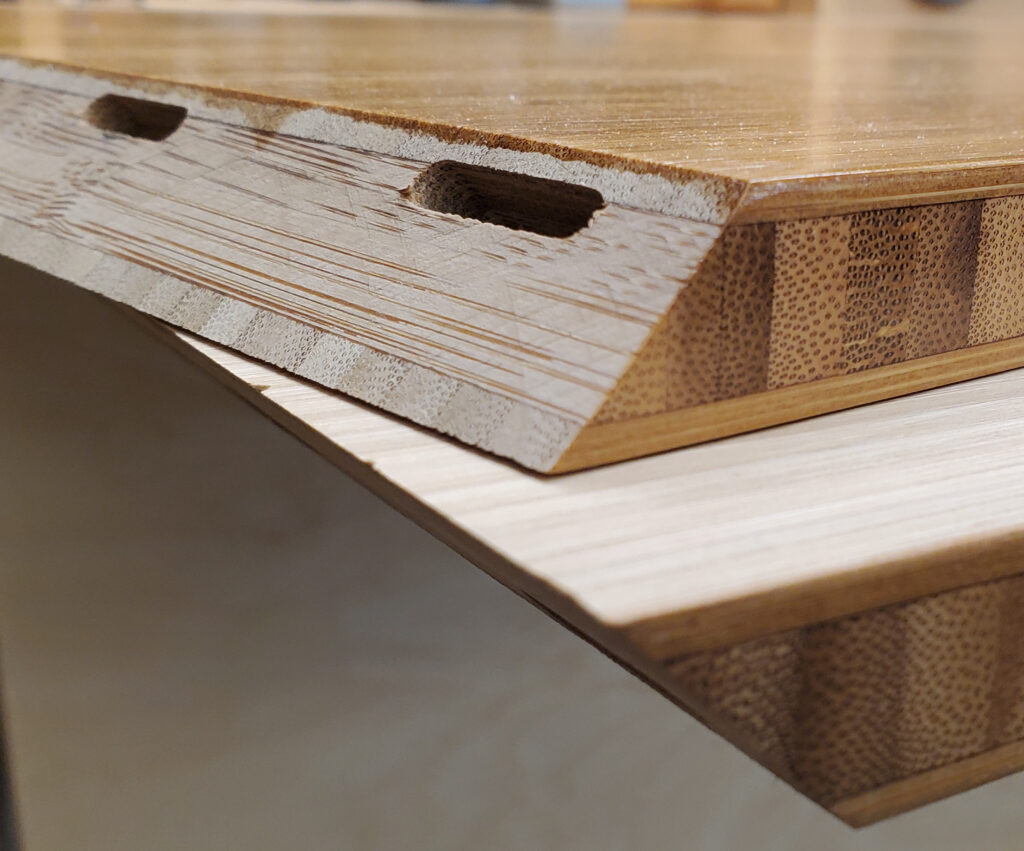
I have a small shop, so breaking down the sheet goods at the tablesaw was a non-starter. While I waited I built a small scale mockup of the boxes to work out the process and decided to buy a tracksaw. I found a Festool setup (also thin pickings due to supply) and used it to rip down the sheets. I decided on the Festool with the hope of being able to get glue-ready miter cuts. It worked out perfectly!

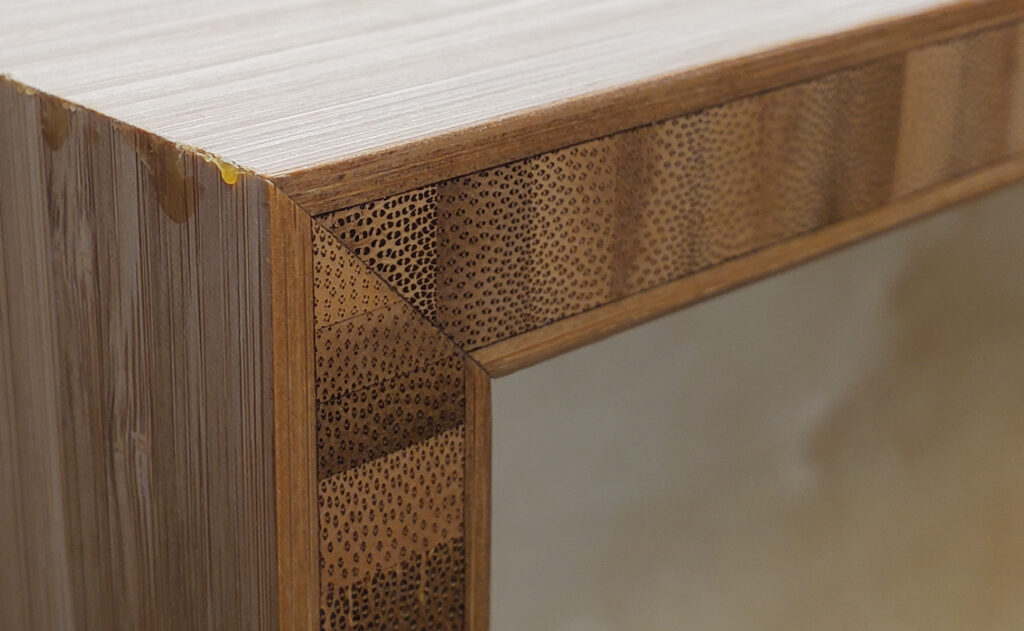
I used a domino joiner to align the parts and set in the shelves and glued up each box in 5 steps. The mitered edges of the bamboo plywood look like elaborate inset banding, and I think the striped surface of the face veneers look great without needing any ornamentation. One of my favorite things about it is the thickness of the outer plies… nowhere near as delicate as regular veneer plywood. I can’t say enough about the tracksaw, I was able to rip at 45 degrees, flip the sheet and the corner was perfect enough for glueup. The bamboo is so hard that carrying the boxes through doorways had me more worried for the trim work than about the bed.
After pre-assembly in the garage, everything was carried up 3 flights of stairs the boxes were put together with connector bolts. The headboard is mounted on a frame that is fastened to the extended sides of the boxes, also with connector bolts. The mattress frame is fastened to the hinge assembly with… you guessed it, connector bolts. I screwed a magnet to the inside of one of the boxes and the 2 Allen wrenches will always be there. The pneumatics are rated for 150 pounds. The mattress lifts easily, moving away from the headboard before starting to hinge up for access to the storage.
- 2026’s Best Dovetail Marking Tool - November 12, 2025
- From Boxes to Cases: Real‑World Benefits of Collinear Marking & How to Use It - November 7, 2025
- Inside the Innovation: How Calibrated Collinear Marking Works - November 5, 2025