The Moxon riser vise has been a popular conversation topic of late and a recent article had me looking at my own, now in its third iteration. I don’t even have snapshots of the first 2 versions. They were made before content replaced cash as King.
My first version was too low and too narrow. It was a way to clamp boards vertically to drill holes for screws & dowels. It did the job, using all-thread and wingnuts. My second was built at the beginning of my dovetail exploration and did the same job, with more elegance and pricier hardware. This post is about my current, 3rd version.
While working with Version #2 I found myself far more comfortable marking out and sawing than I was when chopping. Of course, this was because sawing was happening 6 or 8 inches higher than the chopping that still happened down on the benchtop. Saving my back was the inspiration for V3.
The limitations of version 2.0 included:
- Too narrow between the screws at 12”
- Too low at 4.5”
- Too lightweight & bouncy (made of 5/4 oak)
- Not wide enough to hold a drawer on edge for planing
- No upper work surface
I used 1.5” beech for the stationary parts and 1.75” ash for the moving jaw. I cut a heavy bevel on the upper outside edge of the jaw to allow for angling a saw down to start a cut. I had more ash so it went into the legs also. It would be 6” high and have a generous raised benchtop to move the chopping upstairs where it belonged.
-
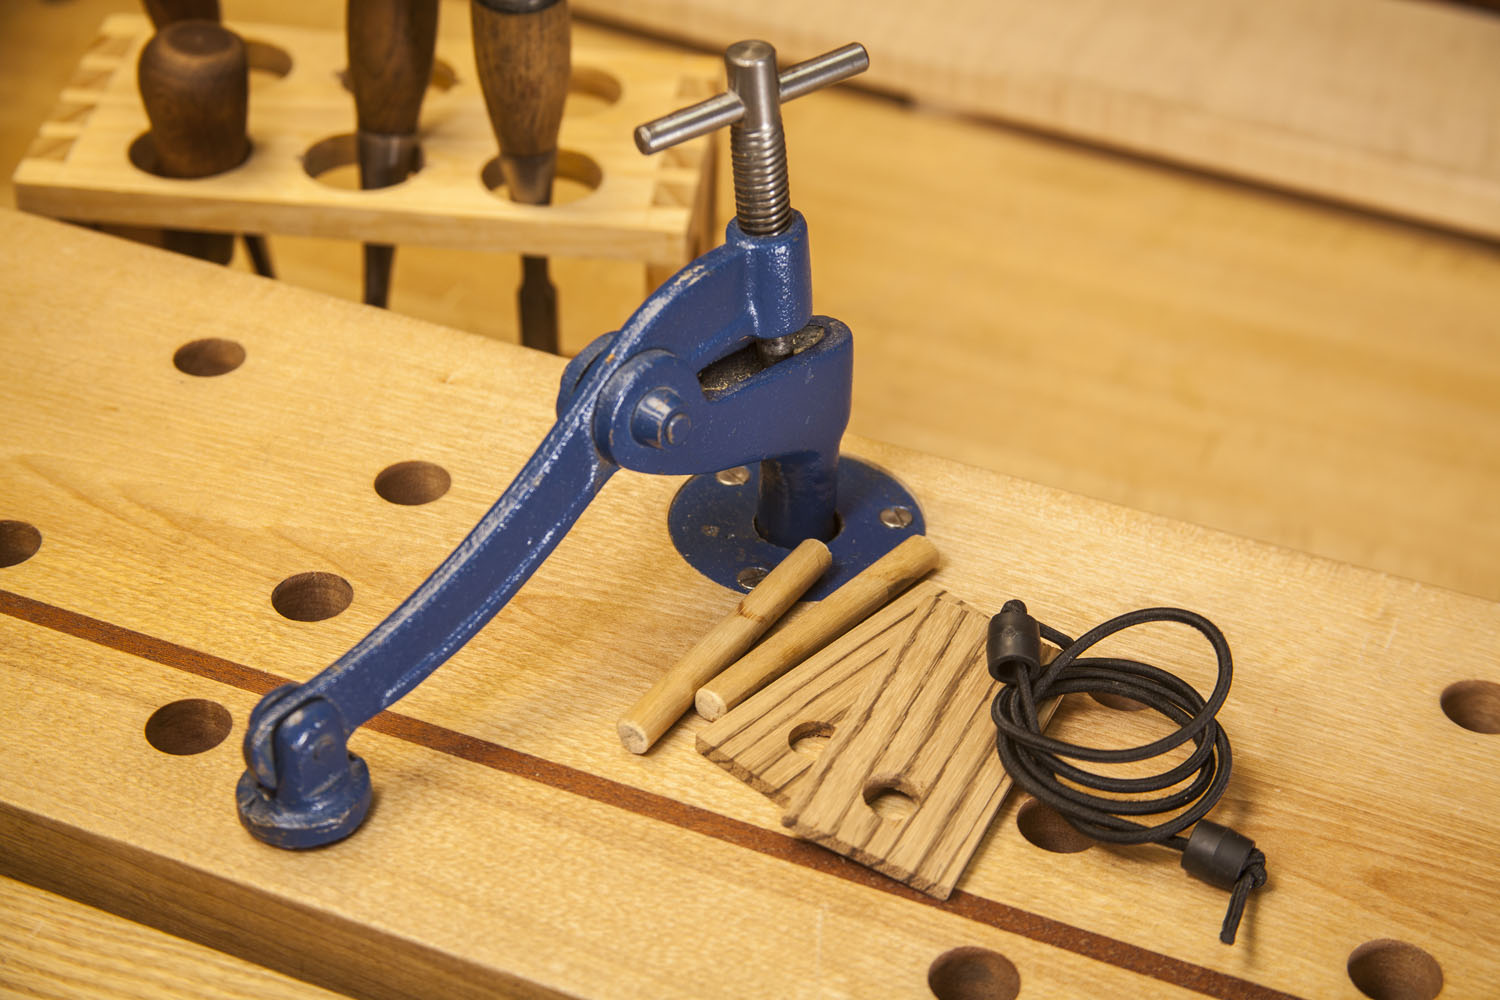
- Parts used for construction.
-
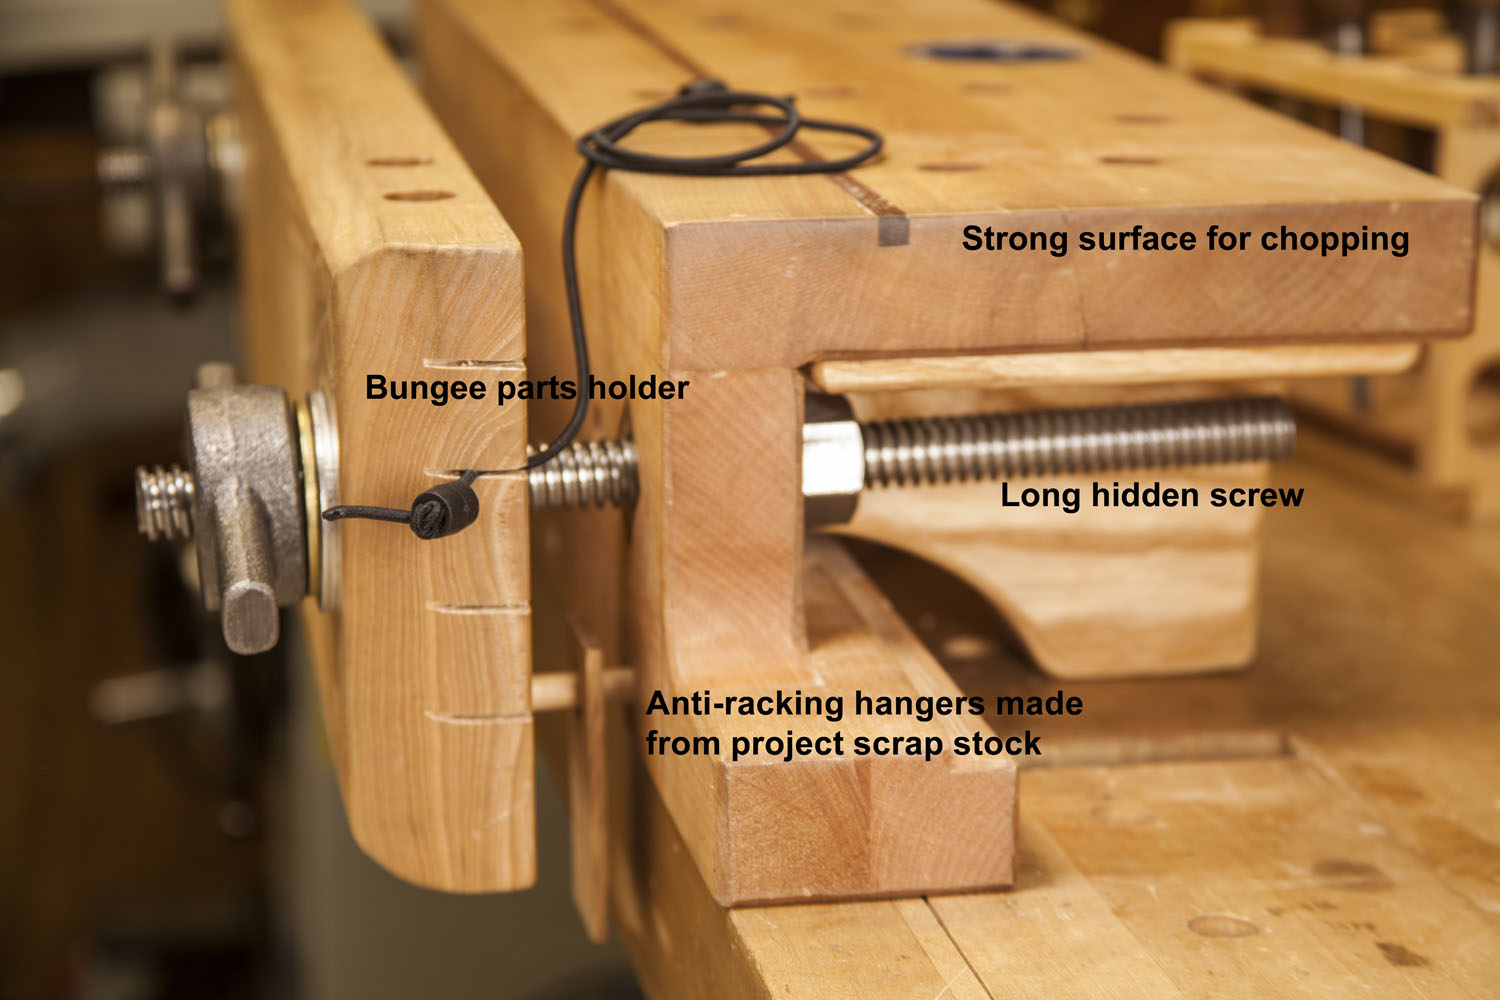
- Side view.
-
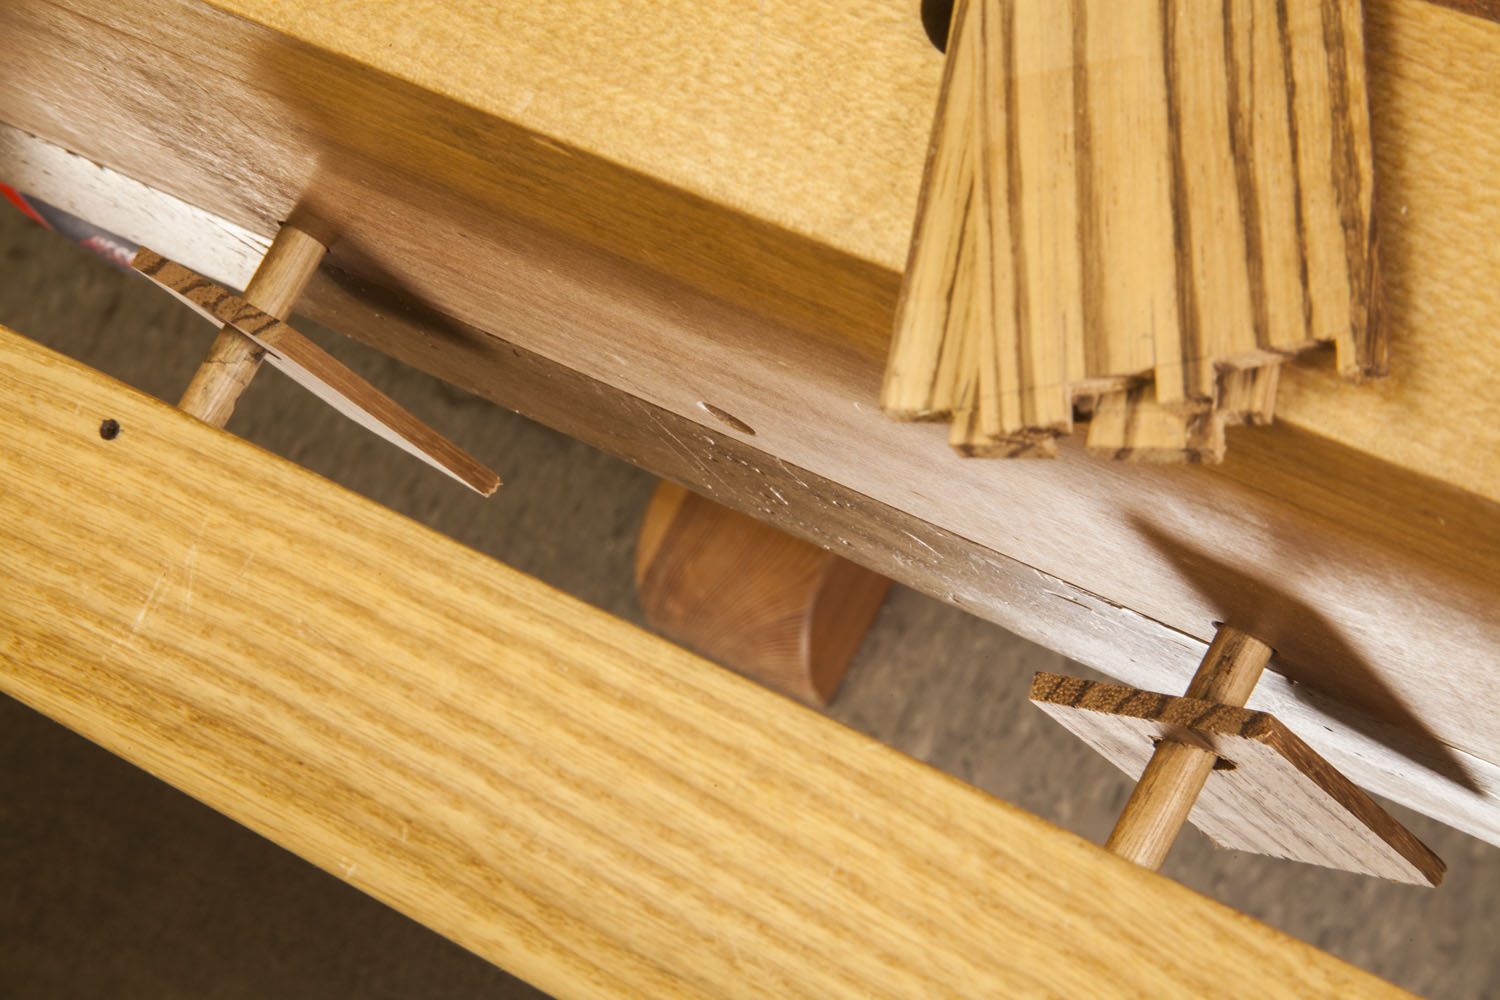
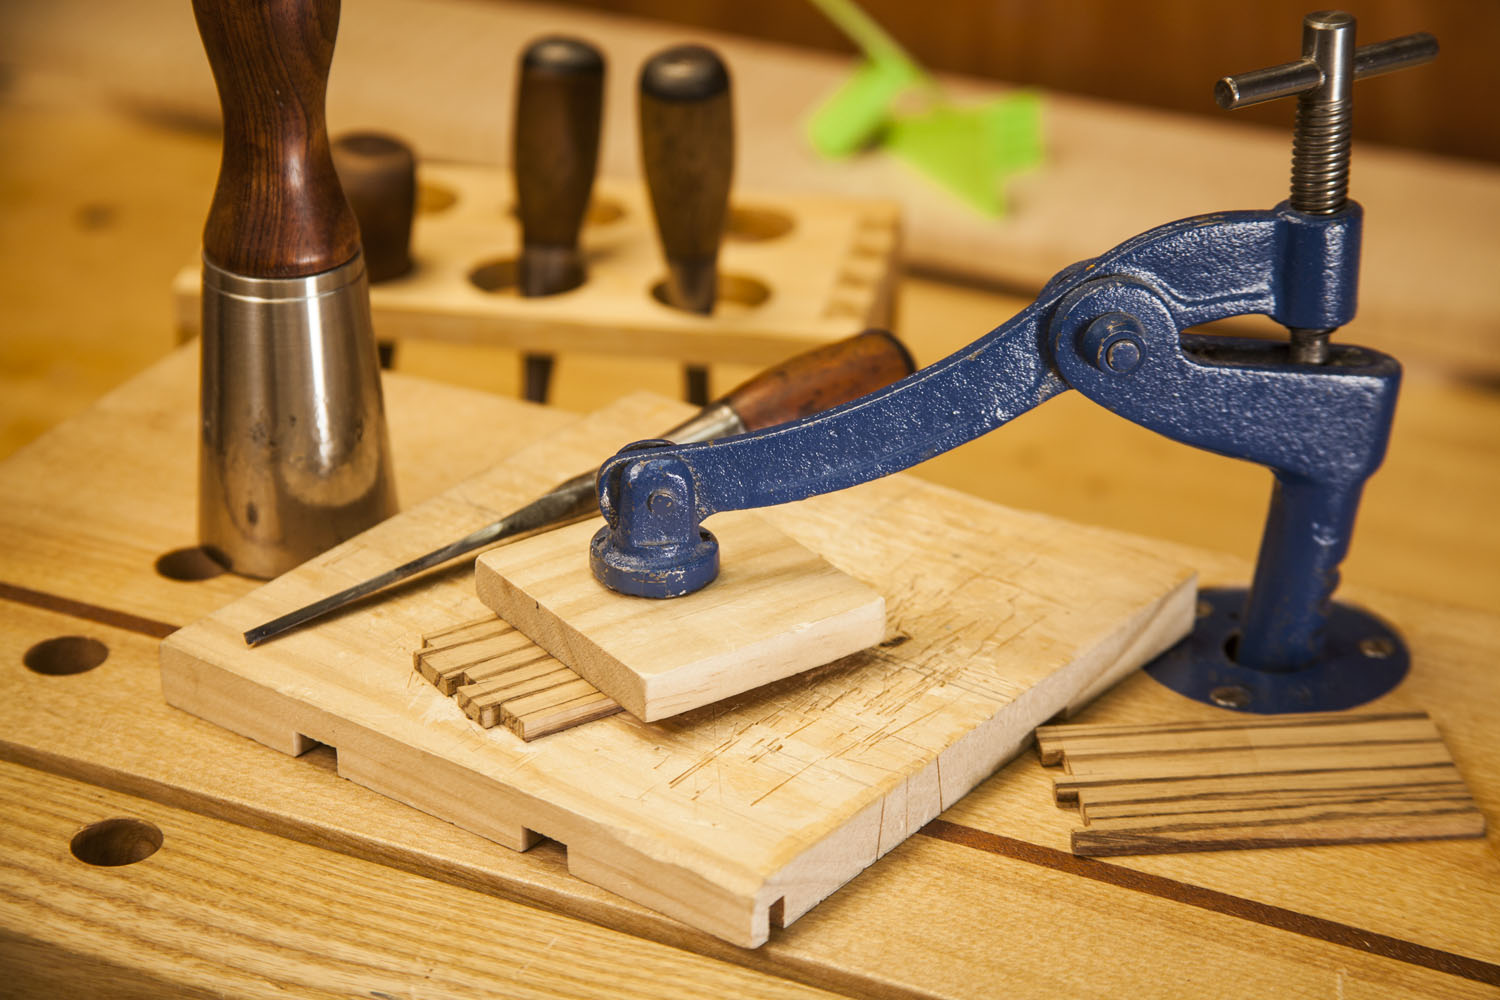
- Small scraps of project stock hanging on dowels to eliminate racking. Dowel holes run about 1/2″ into inner jaw’s face.
-
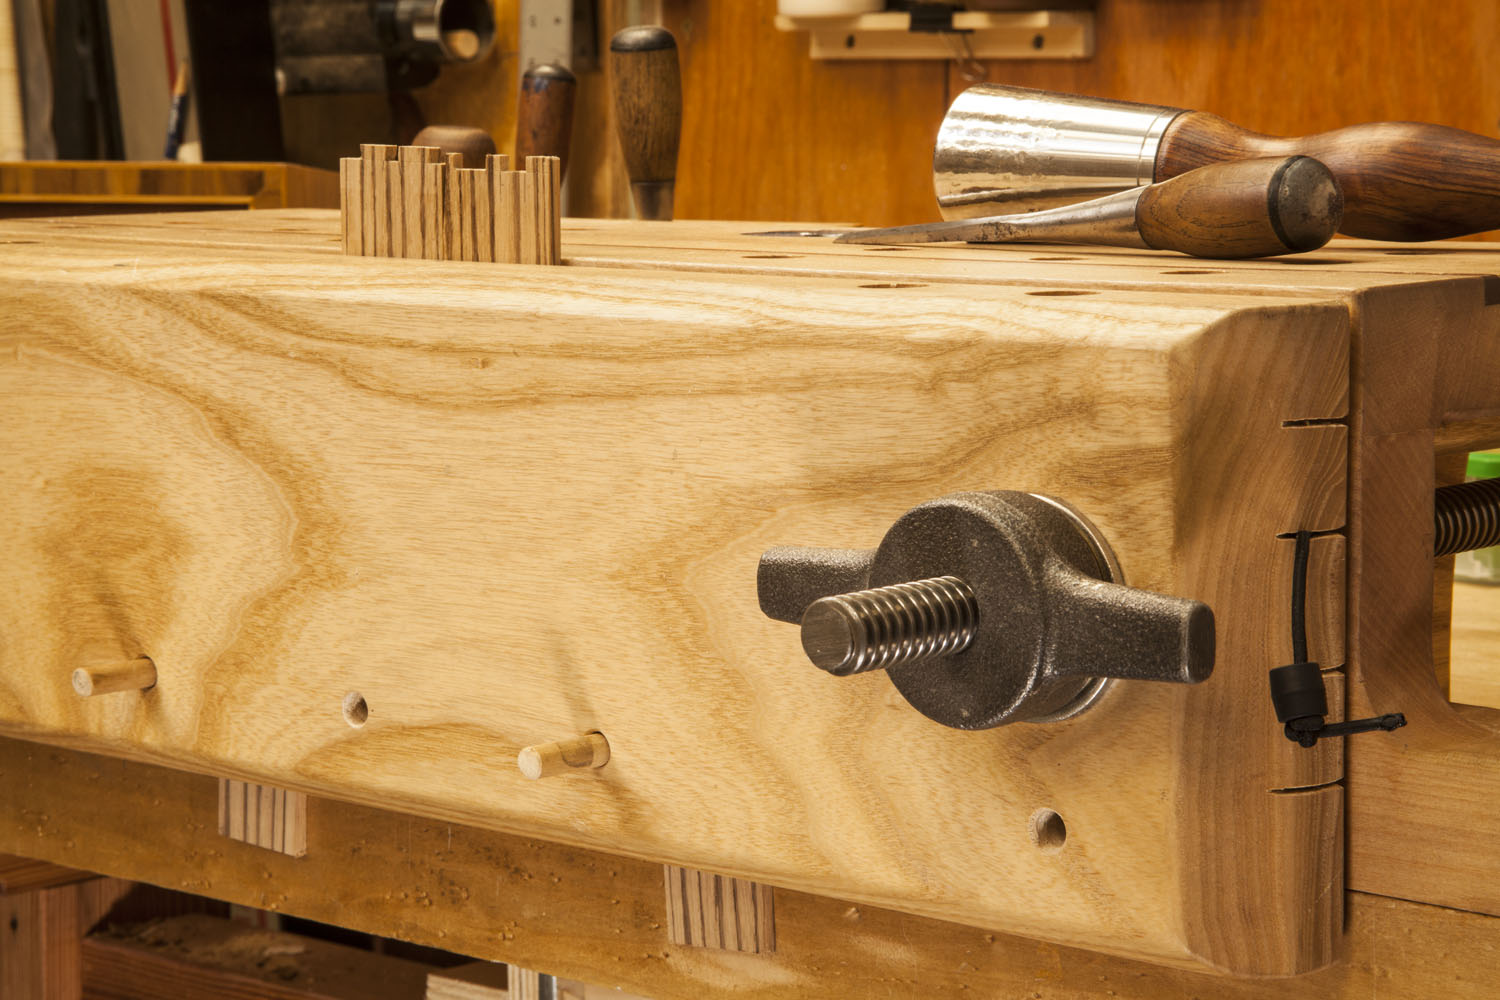
- Front view.
-
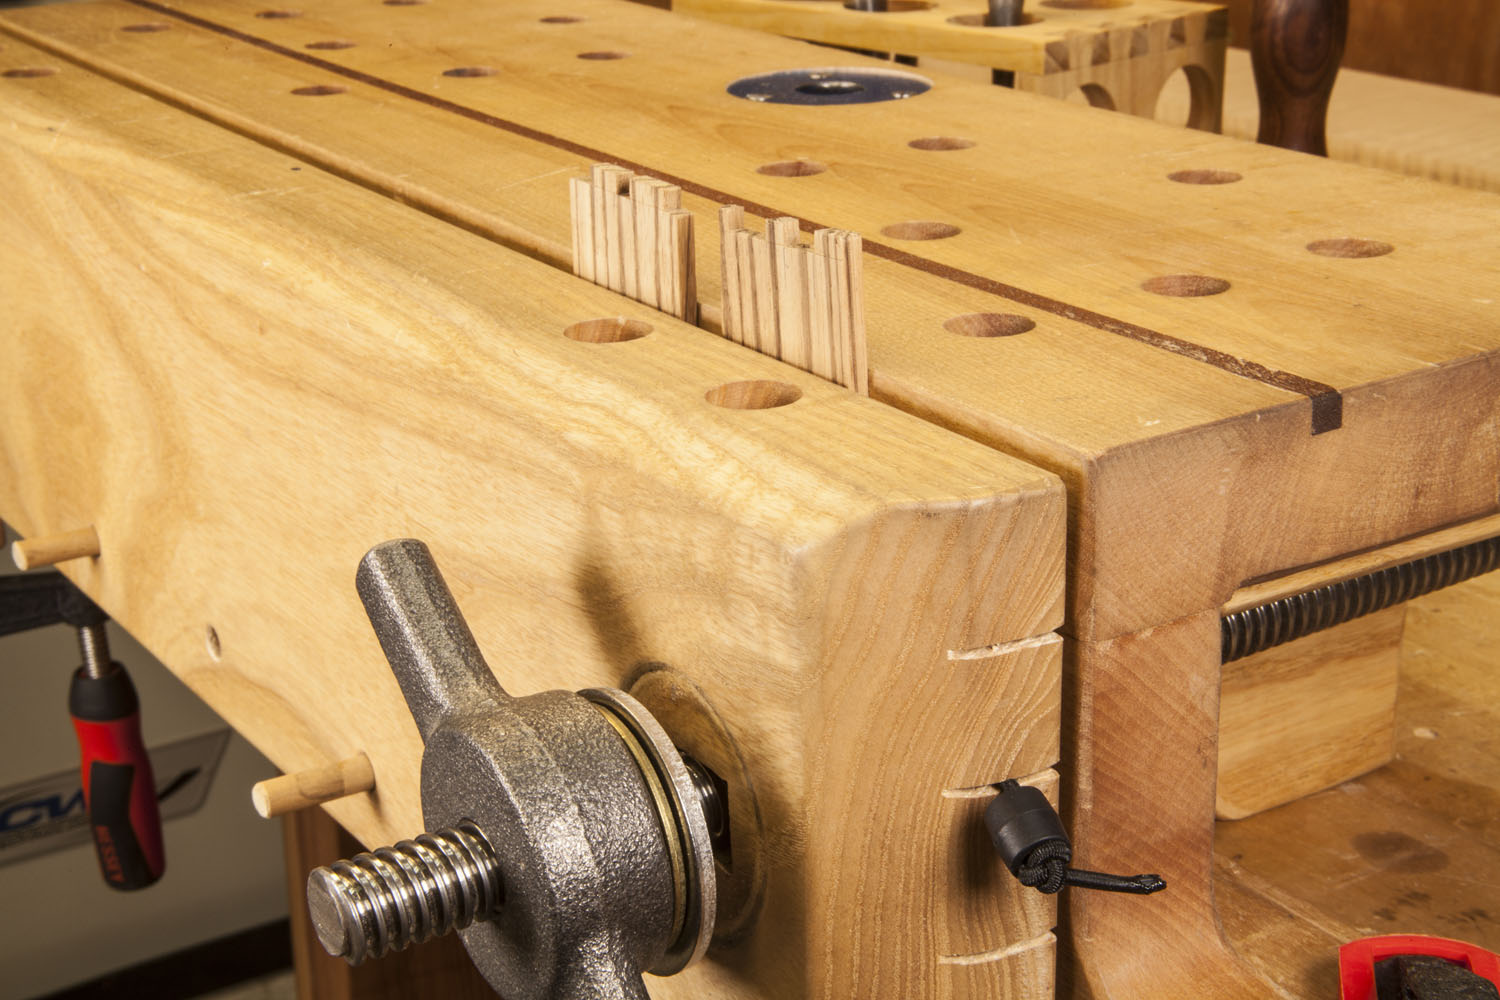
- 1/8″ bungee wedged in sawkerfs keeps small parts from dropping through jaws while adjustments are made. The dark inlay is a quick visual aid for leveling work in the jaws.
-
- Large surface raises chopping to the same comfortable height as sawing. Holdfast collar and dog holes add flexibility.
-
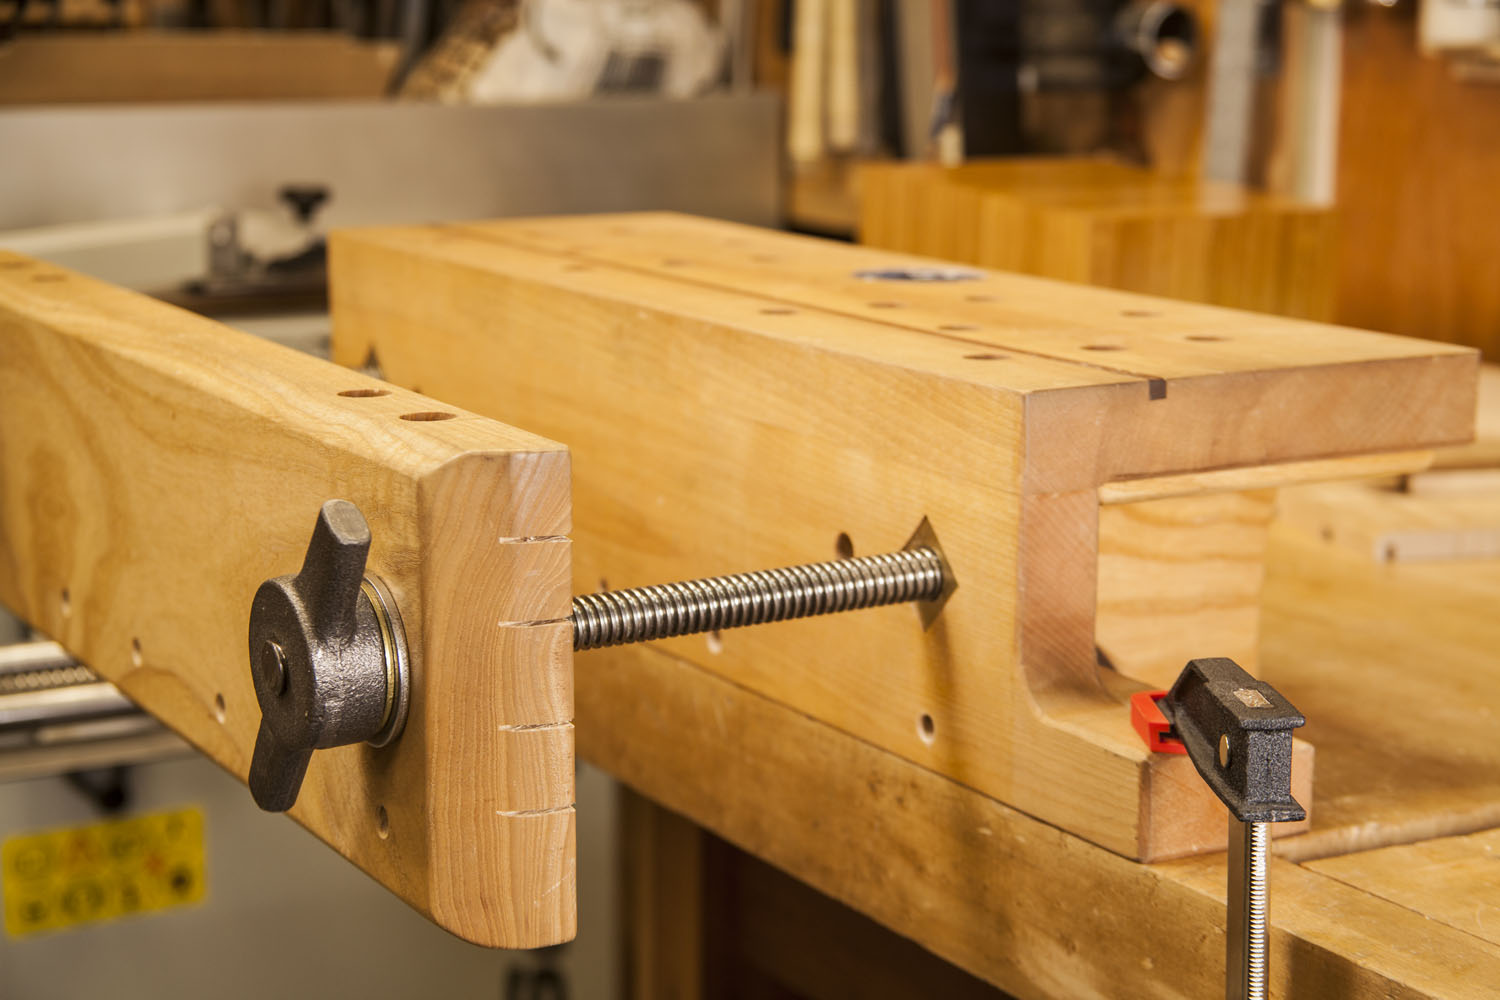
- Square brass nut recessed into face determines depth, jamb nut behind inner jaw allows secure adjustment with 8″ capacity.
-
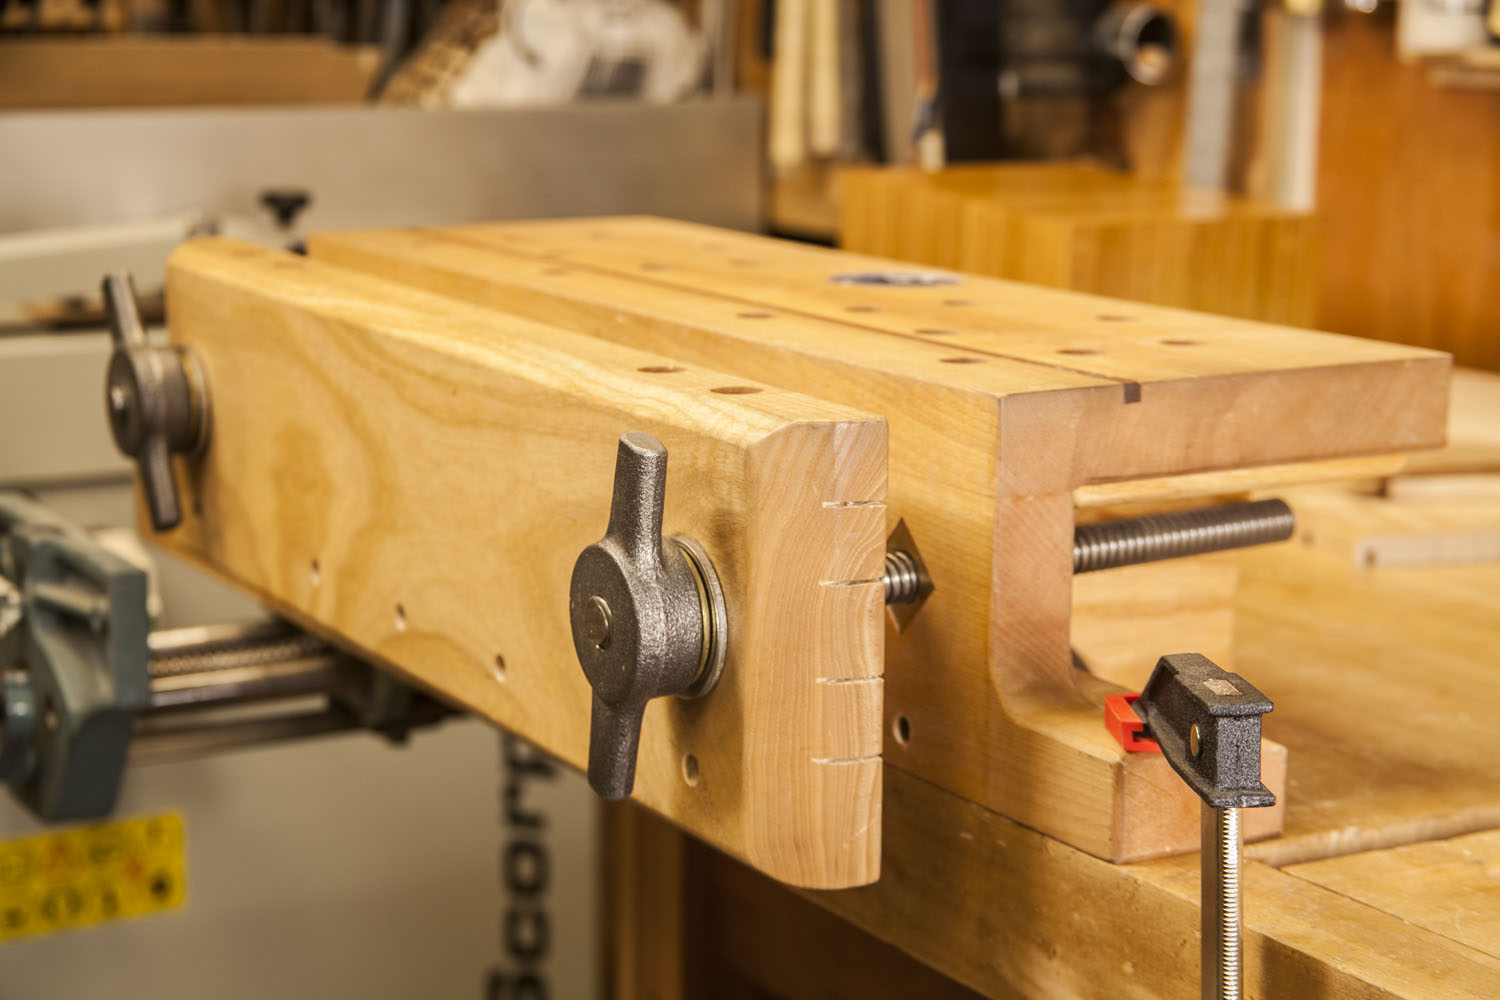
- Open view.
The build was pretty straightforward, with the main difference of the top and super sturdy legs. I totally overthought the legs, they are attached with wedge-type bed frame hardware and will come off to lower the vise, but I have yet to make use of this brilliant “feature”. I bought a 2’ length of ¾” acme screw and cut it in two. I recessed a square brass nut into the inner face and put a jam nut in the back. I can open the vise to a touch over 8” when I need it, but I can also “store” the bulk of the screws under the top when I don’t. All of the hardware came from McMaster-Carr. As soon as it was built I started making changes. First, I added dog holes, then came the holdfast collar which pretty much ended my use of the dog holes. Chopping out dovetail waste on the raised surface is a dream come true.
Throughout my development of Tailspin Tools, I was working with and testing on small and thin stock, making me hyper-aware of the constant racking of the front jaw of the Moxon. After wasting time double-stick-taping scraps to the inside chop I devised the current system. I drilled 3/8” holes through my front chop at the drill press, mounted it back on the vise body, and ran holes about half an inch into the rear chop. All of this is about ½” above the main benchtop. With the holes drilled, I could hang scraps of project stock on dowels at the bottom of the vise. The front chop projects lower than the benchtop and registers the vise against it. The racking problem was gone forever.
Since I mark and cut pins and tails together, there are usually multiple parts in the vise. Keeping them there while making tweaks can be a challenge, and parts may hit the floor. Placing a thin stick on top of the anti-racking hangers forms a floor inside the vise that works very well, but once a part falls in I have to open the vise to retrieve it.
About that time, my Gal brought me a ski jacket she was done with. Over 30 years she has seen me strip & repurposed hardware, straps, and fasteners off many things. The jacket had a bungee in the liner that went straight to the Moxon. I cut 4 saw kerfs in the ends of the moving jaw and the problem was solved. Parts will sit on the bungee as I press the jaw in and tighten the screws and won’t vanish if I loosen it for an adjustment. It will also pull free from either end to bring something back up or to clear chips out. I inset a thin strip of mahogany on the top surface to give a quick visual reference for level; it comes in a lot handier than you’d think. The vise has a coat of Danish oil, but nothing more. I bought some crubber to line the outer jaw but have never felt the need to glue it on.
- 2026’s Best Dovetail Marking Tool - November 12, 2025
- From Boxes to Cases: Real‑World Benefits of Collinear Marking & How to Use It - November 7, 2025
- Inside the Innovation: How Calibrated Collinear Marking Works - November 5, 2025