Two of the questions that have been coming up more frequently lately have been “What are typical dovetail dimensions?” and “What is the standard dovetail size?”. The simplest answer is that the size and spacing of your dovetails is dictated (mostly) by the size of the stock you are using for your project. As with all things craft-related there are exceptions to the simple answer. We’ll cover a few of them here.
Standard Size Dovetails
A standard size dovetail is as tall as your lumber is thick. This assumes you are joining boards of the same thickness with through-dovetails and that you intend to have them flush with the finished corner surfaces on both legs of the corner. If for instance you are joining 1” thick boards both your pins and your tails will be 1” tall.
-
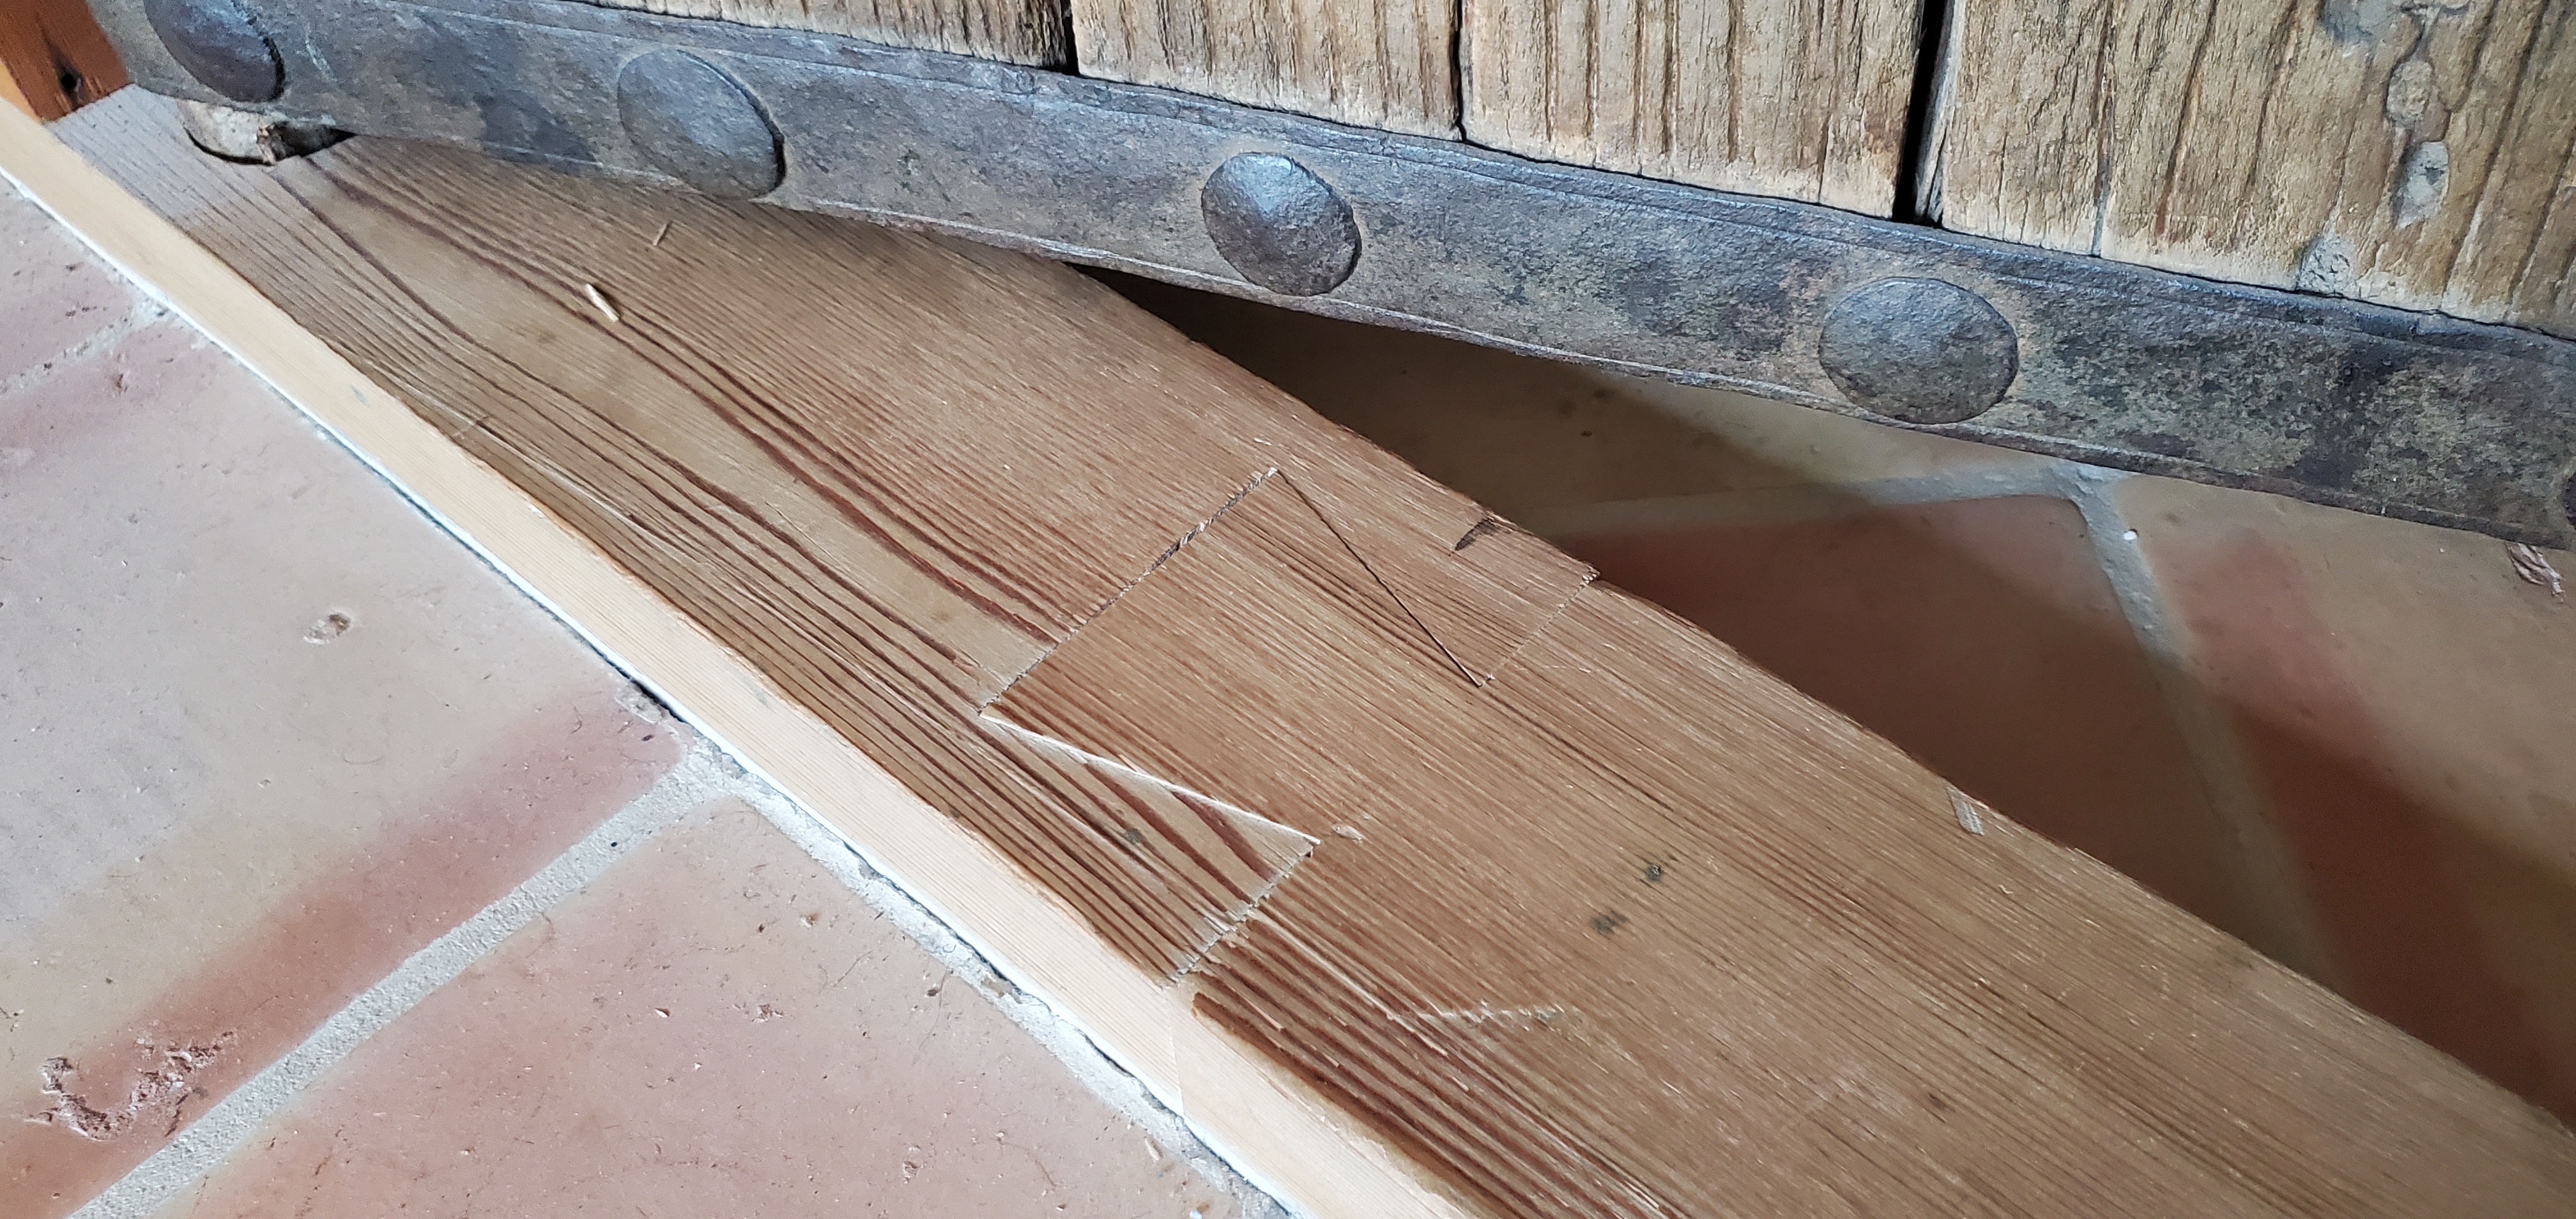
- A standard size dovetail in 4” thick material
-
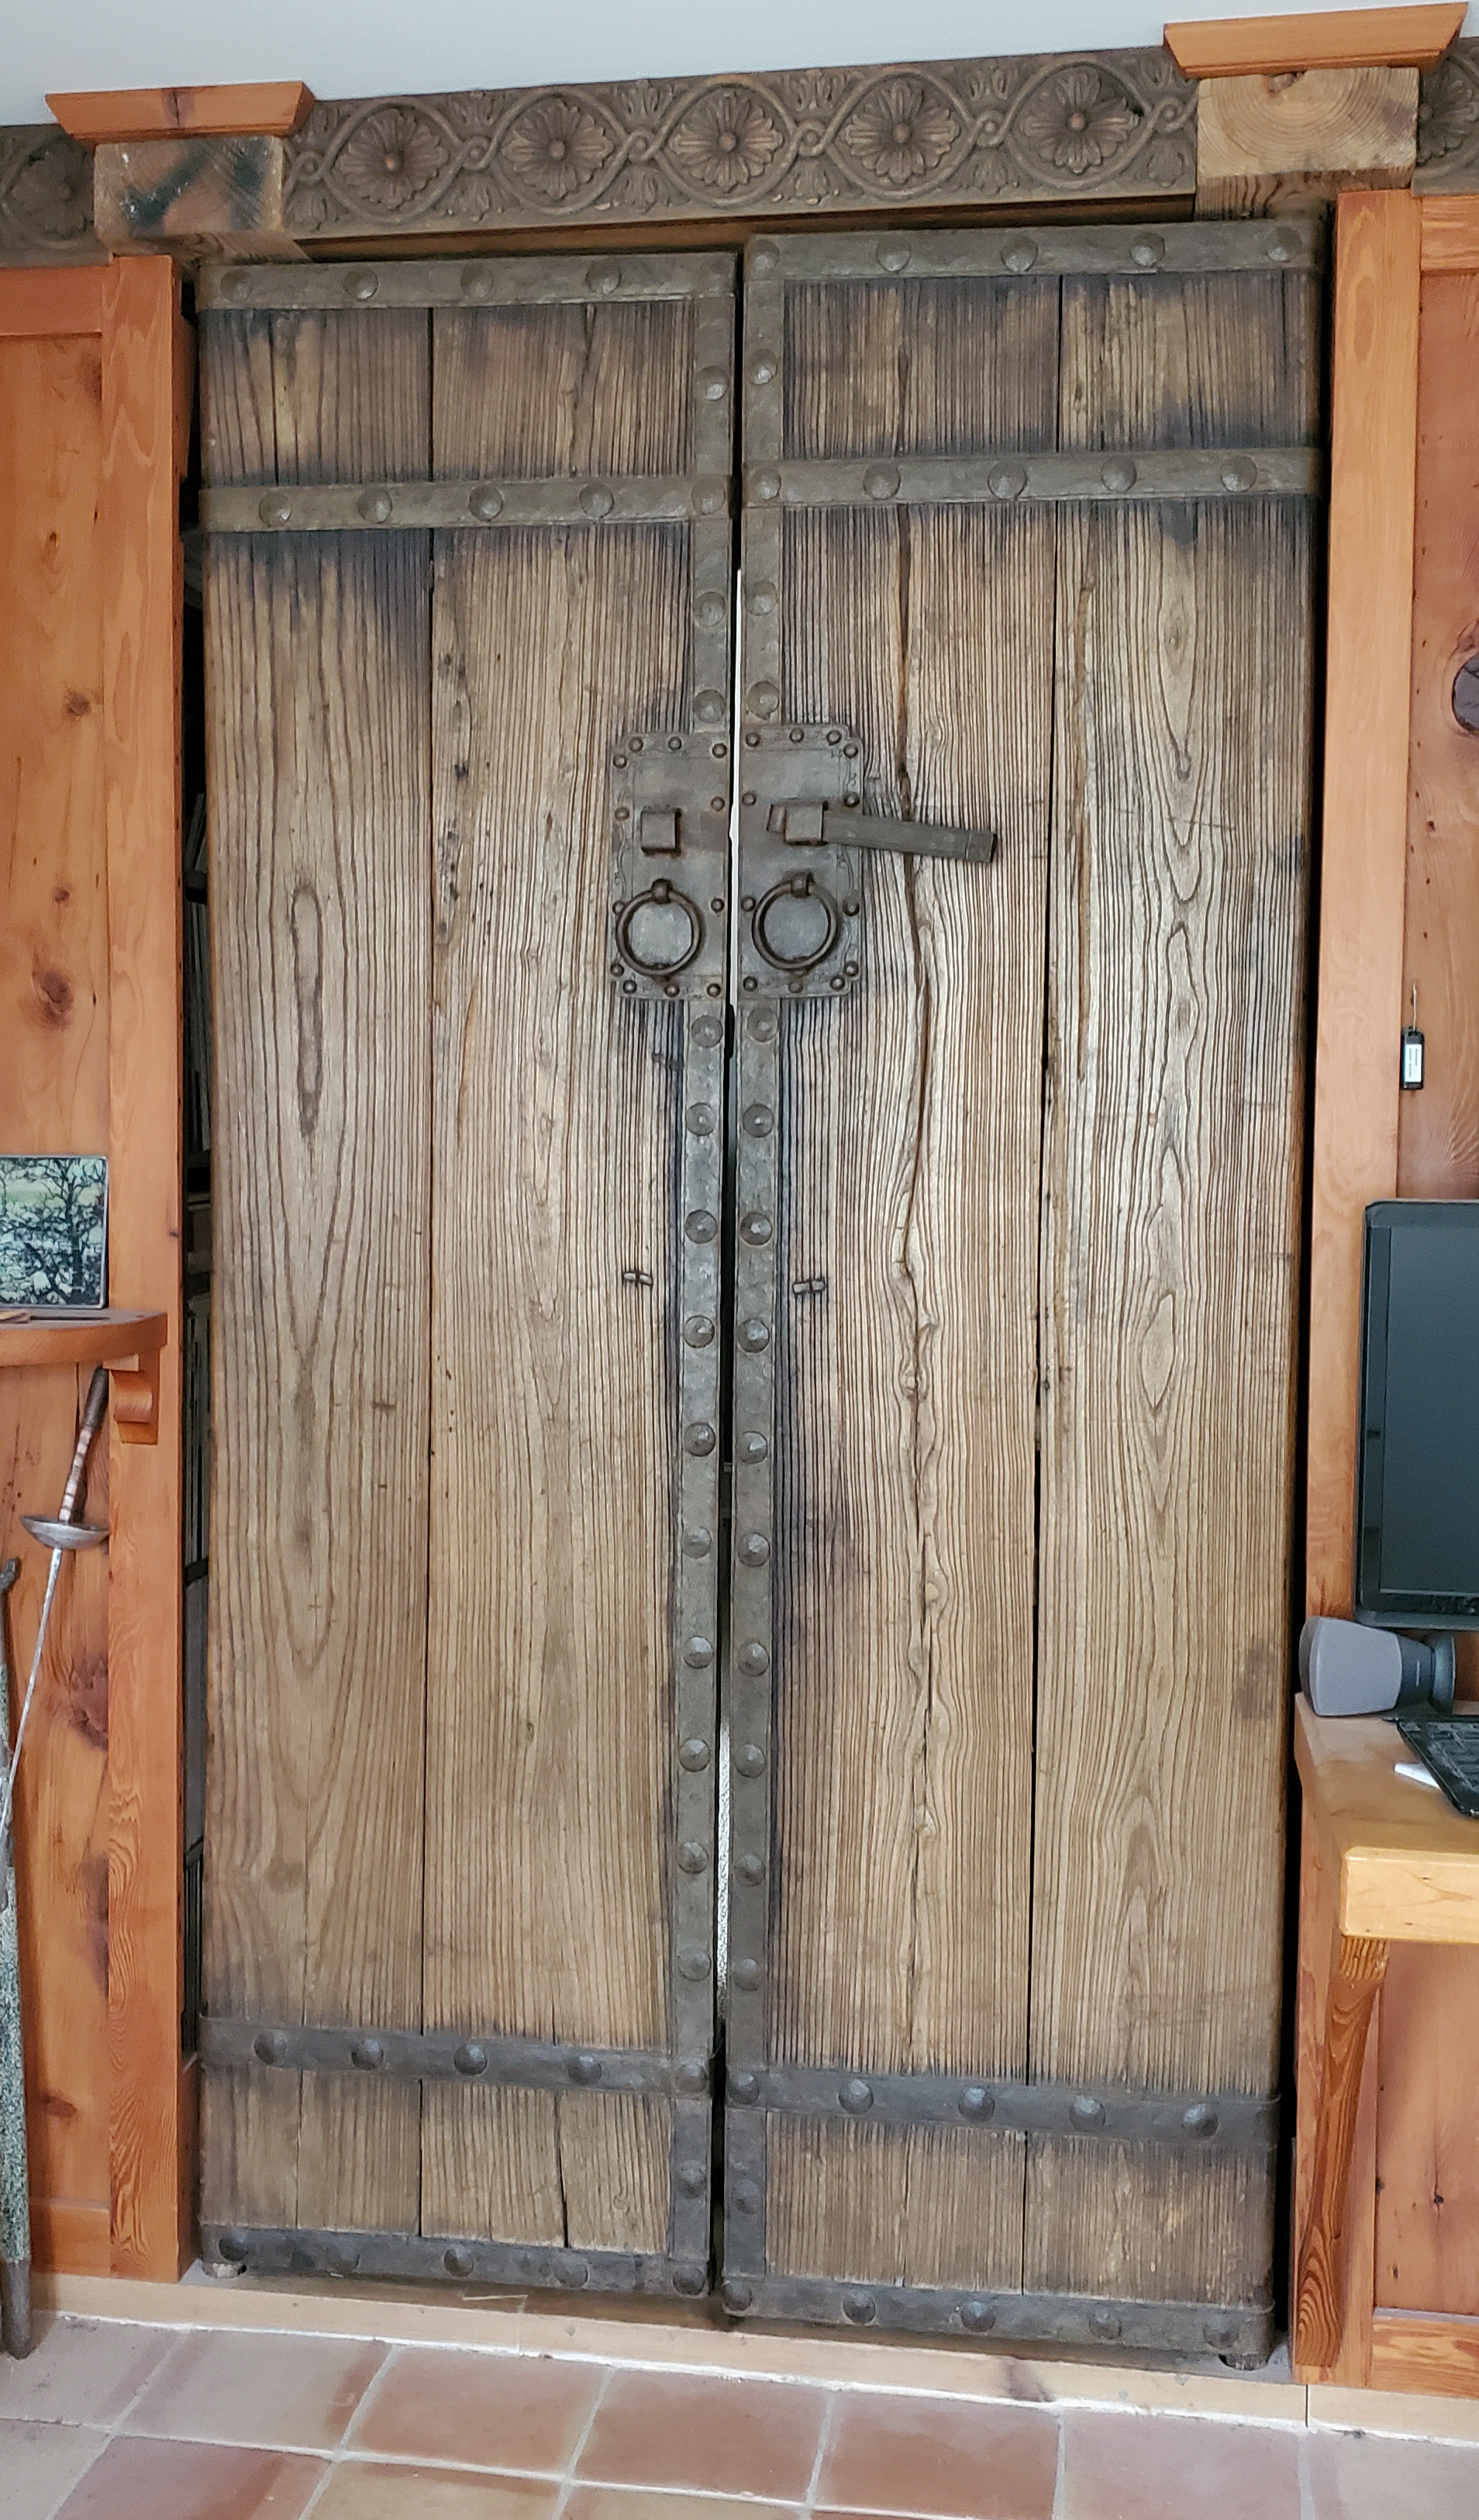
- Full view of doors above the threshold.
This has advantages for laying out your project in that your interior measurement plus twice the thickness of your boards gives you the starting size of your parts. Since most boxes are built to hold something we usually start with the inside measurement. For drawers the opposite is true and they are built to the outside dimensions to fit in a case or pocket. Again, through dovetails make it easy… just cut the parts to the size of the case and get to dovetailing. Since no material is lost the fit should be perfect in the end.
The width of a dovetail is determined by the intended function of the container being made and the aesthetic sensibilities of the maker. Form and function are a pleasing pair when it comes to dovetails. There is no joint that is at once the strongest AND the most interesting to look at. Throw in some of the exceptions we’ll talk about later and there can be serious eye candy. The function of the project is the jumping off point for deciding dovetail width. What stresses will the joints have to endure? A kitchen drawer holding flatware is probably hanging on slides so the only real stresses are opening and closing the drawer. A picnic chest holding the same flatware plus the rest of the fixings for a day outside gets stressed in all directions and might even get dropped or used for seating. A small drawer in a jewelry chest will probably be handled so gently that gravity is it’s only enemy. So how to decide on sizes?
For factory-made drawers, machines cut dovetails in a 1:1 ratio, just like the puzzle-edged floor mats at the gym. They are machine made and look it. They are also extremely strong without being labor intensive, a nice combination when faced with cranking out a kitchen on a budget. I mention the machines because they provide a look that most crafts people want to avoid at all costs. If you cut absolutely perfect dovetails in this pattern they will look like you used a router. We need something different.
-
- A machine cut dovetailed drawer.
-

- A dovetailed rubber mat.
TStarting with strength, more dovetails means there is more surface area being glued so in theory more is better. This breaks down as the pins and tails become narrow enough to tear and fail before the joint does. For good strength the narrowest part of the pins should never be less than 3/16”. Spacing varies by maker. For me, the base of the tails is between 3-6 times the width of the narrow end of the pin to look “right”. When getting int extremely fine work like that jewelry drawer some makers go as far as making the pins just a single sawkerf wide. This is known as the London Pattern.
In many cases, the width of the tails is determined by the width of the stock. As you lay out a dovetail joint, adding one more pin can alter the look (and the amount of work) dramatically. Testing the layout using tape and a marker can help you visualize the changes before committing to it. The spacing of the pins changes the size of the tails.
To make the work even more obviously handmade, alter the spacing or angle ratio within a project’s joints or even just a single corner. The photo below shows the huge difference a couple of changes can make. For most uses this will not affect strength, and intentional asymmetry on the left was created using Tailspin’s 1:4 dovetail marker for the half pins and a 1:6 dovetail marker for the central full pins. for the central full pins. Changes like this can be far more interesting than the perfect row of tails on the right (pictured below).
-

- Made for each other, no transfer needed!
-

- Optional sizes
For the record, these joints were marked using Tailspin Tools collinear marking tools, cut using the shop-made saw guides you can see here, and they slid together perfectly right off the saw.
Half-Blind Dovetail Sizing
Half-blind dovetails are used in casework and boxes when you don’t want to see the ends of the tails on the corner. This is considered by many to be a more refined application of the joint. Drawers are made this way so the drawer front can present a clean face and cases so that the show faces are uninterrupted. A peek around the corner shows off the skills of the craftsman. When joining stock of the same thickness a good starting point for the height of the tails is 2/3 to 3/4 of the thickness of the stock. The layout requires two setting on a marking gauge (or better yet 2 gauges!) and some additional visual gymnastics. You can alter the heights and widths of individual tails to create visual interest or even send a message.
Joining stock of different thicknesses can present opportunities for dazzling dovetails by varying the sizes and spacing just for art’s sake. Combining through and half-blinds creates a hybrid dovetail that is useful for putting a captured panel in a box, and half-blinds in a pattern of sizes yield Houndstooth dovetails that are strong, beautiful, and limited only by your imagination.
I suppose the idea of a standard size dovetail really relates more to what you have seen and expect to see more than any limitations on the craft. Have some fun, mix and match ratios, sizes, styles, spacing, and whatever else you can think of.
- 2026’s Best Dovetail Marking Tool - November 12, 2025
- From Boxes to Cases: Real‑World Benefits of Collinear Marking & How to Use It - November 7, 2025
- Inside the Innovation: How Calibrated Collinear Marking Works - November 5, 2025