I’ve been asked so many times about the dovetail saw guide blocks I use in the video at 4:22 so here they are. I’ll show you how I made them.
There are many products out there that use magnets or clamps, and all of them will get you there too. I made my first set because free same-day shipping was available from the cutoffs bin! You can find a drawing here.
The blocks are the 7th life for this maple stock. They started life as a butcher block table in about 1986. The second incarnation was as a drop leaf in my new kitchen, and the third a small desk in my second studio. Next a kitchen island, and a set of Japanese style low dining tables. As it got smaller the cutoffs hit the bin.
After a cutting board that fit over the galley sink of a friend’s sailboat I found myself left with a block about 6×8 inches; just enough for my guide blocks. I sized the blanks to the depth of my saw, letting me establish the cuts before the sawback hits & enough surface to keep the saw flat with my reach-over technique. You’ll learn how much pressure you need after a while, and your fingers will thank you when you ease off a bit.
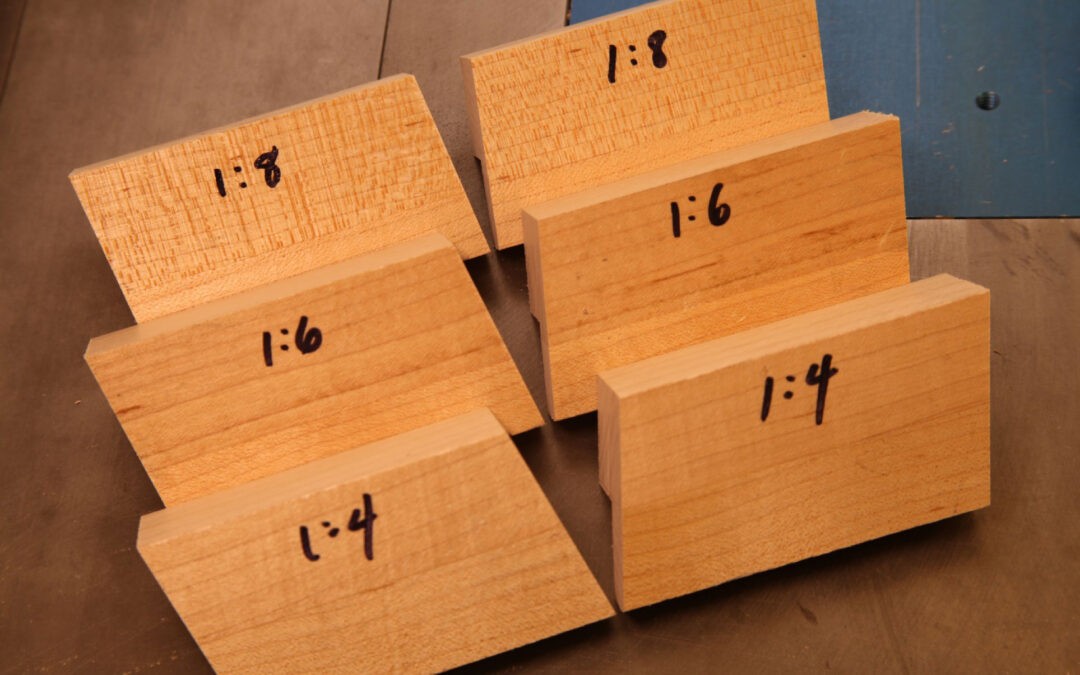
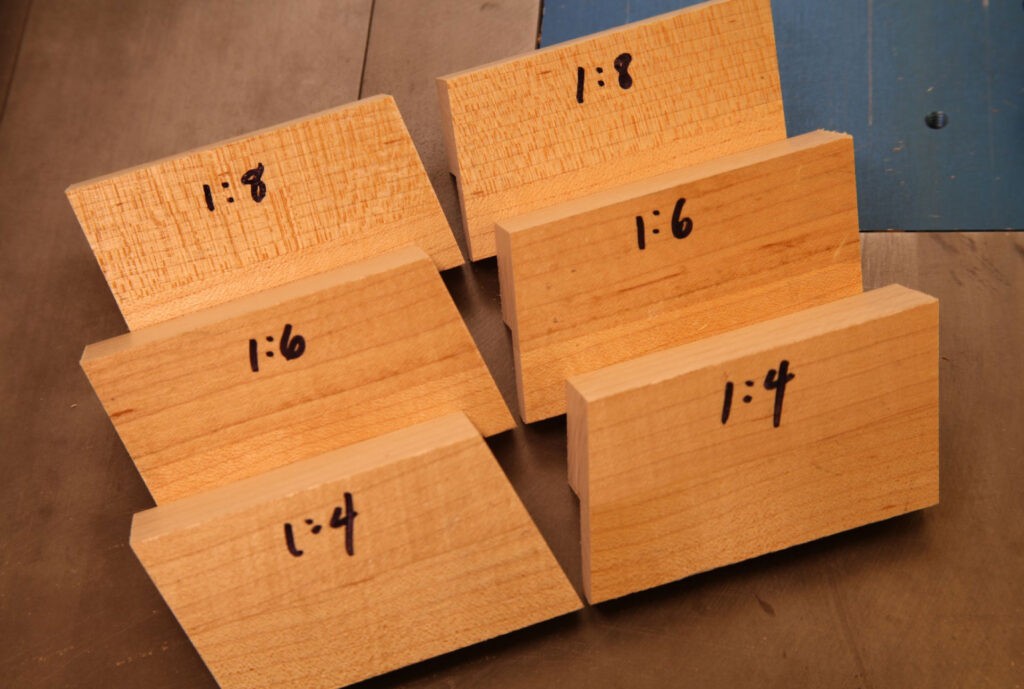
I ripped the block into 3, 1 3/4” x 1 7/8 ” blanks with square edges. I ripped to tablesaw-square, not bothering with the jointer. Each blank would become a set of 2 guide blocks, one each for 1:4, 1:6, and 1:8 dovetail ratios. While the saw is set up I mill an extra block or two of whatever I have laying around to use for test cuts.

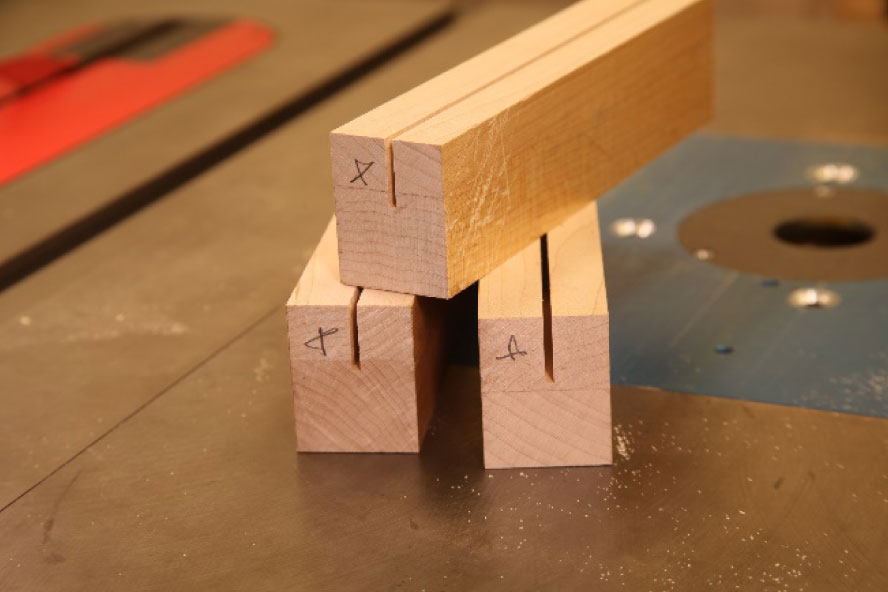
One large rabbet forms the shelf that will ride on the edge of the stock to be dovetailed. First, cut a kerf 7/8” deep to leave a ¾” reveal on the narrow edge of the stock. That’s half the work for the rabbet. Mark the wider of the 2 sides for removal later. You’ll cut the waste away after the angles are cut.
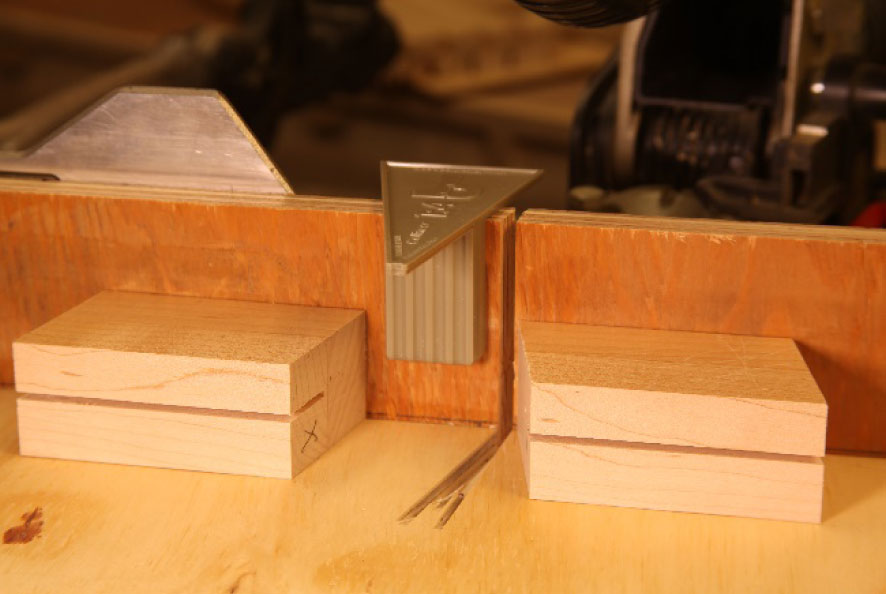
I make a short parts carrier for my chopsaw to eliminate the slight variation in the fences. I fasten it to my chopsaw’s table with heavy double-stick tape made for CNC router applications. If you trust your chopper’s fences you can skip this, or you can cut them on any other machine or by hand. I like the chopper because once it’s dialed in it is dead simple to make the 4 cuts needed for each set of guide blocks and know they are all going to match.
Use your TailSpin tool to set the initial blade angle and then to check for accuracy as you dial it in. You’re making two opposing blocks to guide all 4 saw orientations to make pin & tail cuts.
When the ends are done go back to the tablesaw and set up another stopped cut to release the waste block, completing the rabbet for the shelf. Overcutting the inside corners will keep any corner fluff on your workpieces from interfering with solid contact. Ease the corners to save your fingers.
I leave the contact surfaces unfinished to keep them grabby and I lube the ends with a block of candle wax that I keep around for driving screws. When they get scratched up enough I’ll make a new set and the last life for these will be in the firepit.
I hope you enjoyed this little how-to. Please leave your comments. I’d love to hear about your methods and uses, or suggestions.
~ Myko
- 2026’s Best Dovetail Marking Tool - November 12, 2025
- From Boxes to Cases: Real‑World Benefits of Collinear Marking & How to Use It - November 7, 2025
- Inside the Innovation: How Calibrated Collinear Marking Works - November 5, 2025