
The first step in any dovetailed project is committing to cutting dovetails. There are SO many easier, faster, easier, and faster ways to join 2 boards or to make a box that it comes down to the commitment, the decision to do it the hard way…the best way. “Check out these biscuit joints” is a phase never, ever uttered by man, and yes, I have a Domino.
RELATED POST: Point of View using TailSpin Tools from the user’s perspective.
The process for making a dovetailed box can be broken up into stages. The first is the “why” of the project which can range from “I want to try and cut a dovetail” to “I want to build a faithful reproduction of a William & Mary Highboy with all the trimmings”. The point is there is a target that will guide your decisions on a macro scale. Lumber species, stock selection, joinery style, and the rest will be guided by the Why of your project.
For this post, the Why will be a box to house your complete collection of whatsits (nameless things), and it will be joined by through dovetails.
Creating The Dovetail Box Parts
Once you’ve decided on through dovetails (and told at least one woodworker friend so you can’t back out), things get easier before they get harder. All of the parts for the box will be full size. Because the joints all go through the full thickness of their respective mating parts a 10 X 18 inch box will require two 10 inch parts and two 18 inch parts…easy-peasy. Size the height of your box to fit your tallest whatsit you will store in it, and allow for a top and bottom. The parts should be the same width and thickness, with all edges dressed square and true – “four-squared” some call it.
Be sure to read my other project article where I created small dovetail drawers for a funerary urn.
There are many ways to get to four-squared, and there is only one right way: The way you choose to do it today. Use your bandsaw, tablesaw, chopsaw, or handsaw. Use your jointer, planer, shooting board, or router. Use a …you get the idea, use what you have and know how to use or try something new for the sake of trying something new. Spend 5,000 hours on Youtube if you feel like it, then commit. I promise you’ll pick the right way. Next time maybe you’ll pick a different right way, eventually you’ll land on your favorite right way. Today I used a crosscut sled on the tablesaw followed by a trip to my shooting board, followed by a trip to my sharpening station, and then back to the shooting board. Now that our stock prepped we can move on to the question at hand:
How Do You Lay Out Dovetails?
Machine-cut dovetails are usually cut with a router and a guide or jig. The most common form of jig is what I call the Bear Comb. The bear comb jig is a series of regular teeth with a width matched to the router bit and guide collar it is designed to be used with.

A bear comb router jig
The spaces between the teeth are usually make pins and tails of the same size.. The result is a very regular and equal pattern to the joint, easily recognized as machine cut dovetails, otherwise known as Zipper Dovetails. Zipper dovetails are fugly. Laying out dovetails for a bear comb jig is not necessary since the jig determines the spacing. You cannot design your
layout, you just position your stock and run your router on the jig.
There are adjustable router jigs that allow you to alter their tooth spacing to get a look that comes closer to hand-cut, but they are prohibitively expensive and can be difficult to master. To me they are meant for production shop environments cranking out large volumes of drawers for custom cabinets with a more bespoke look. For the rest of this post the assumption will be that we are cutting our dovetails by hand, although the layout techniques could be applied to an adjustable router jig.
The considerations for dovetail layout are both functional and aesthetic. On the function side you want your joint to hold together under the stresses anticipated by the why of the project. In this case our whatsits don’t have a lot of weight, so those stresses can be ignored. If we were building a chest to transport cannon balls in the back of a truck over rough terrain we’d have a bit more concern.
On the aesthetic side, we want our dovetail layout to be beautiful to look at. Many feel that a uniform, symmetrical layout is the only way to go. An “organic” layout where the pattern is symmetrical but not uniform looks and feels more like the handwork of a craftsman. More formal work leans towards uniformity, a one-off creation can be whatever you want it to be. We also need to consider the dovetail ratio, or slope angle, how many pins and tails we want, and how wide they should all be.
The standards for ratios are also a settled question in many minds; 1:4 for softwoods, 1:6 for general utility, and 1:8 for formal high-style work in expensive hardwoods. There are project-specific advantages sometimes to help you decide. For instance a 1:8 ratio on the same size half-pin will let you cut a groove for the box bottom lower in the box than a 1:4 would, saving some internal space. Sometimes these small details can make or break a project. If you are making a reproduction, copy what you see. If you are making a whatsit box, go with what feels good to you. Think of a one-off project like this as an exercise to experiment and learn for future projects. My box is poplar, with a ratio of 1:6.
Dovetail Layout Considerations, Sizing and Spacing
Uniform dovetail layout can be accomplished in a variety of ways. The “standard” for layout calls for a half-pin at the edges of the joined boards. This convention is based on the pinboard’s position on the front of a drawer to take advantage of the physical properties of the dovetail. With a half-pin the top edge of the drawer facing you as you pull it from a case is a continuous surface. While a half-tail would result in a plenty strong joint, it would not be as pleasing to the eye in the case of a drawer. For our whatsit box it does not matter, but we’ll go with half-pins at the edges of the 18” sides because that’s how the box will be viewed and also to keep some readers’ heads from exploding.


Half pin and half tail drawers.
So with half-pins decided for our long boards we can talk about pin size and spacing. Since my whatsits are 4 ½” tall, I’ll mill my stock to 6” wide. If I lose ½” each of interior space to the top & bottom I’ll have 5” inside the box, a nice comfy fit. The main thing we want to avoid are pins and tails that are the same size. Same-size looks like it was machined with a bear comb, so which should be larger? If you go back up to the last set of photos you’ll see that the red oak drawer was made with wide pins and the white oak with wide tails. Layout-wise they are pretty much identical. The white oak’s layout is the more traditional, with smaller pins and wider tails. I prefer it personally so that’s my choice for this box. You can make yours however you like.
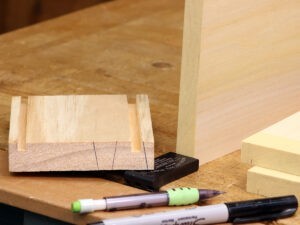 For medium to large boxes and drawers I start with the fat part of the half-pin about 5/16” wide because I use a Stanley # 148 match plane to cut the grooves for the bottoms. For smaller ones I’ll use the # 147 which gives me a bit less meat for the half-pin and a narrower groove for a lighter bottom. I’ll put a tick mark for the half pin on some tape wrapped around the edge of a board while I work out the rest of the layout. I have a saddle square from Bridge City tools that happens to be 5/16” thick so I use it to mark out my half-pins. I just clamp it in the vise and I have them marked in an instant. Getting to know your tools and not having to measure takes a ton of variables out of many processes. I use “found” measurements like this every chance I get, and I’m a huge fan of physical registration over a ruler and square whenever possible.
Dovetail sizing and spacing are the two things that will decide the look of my box. I use the taped edges to allow me to play with the layout without marking up my parts. Playing with these elements is another place to use what you have on hand. My whole collection of tools can come into play here. I’ll be posting a video soon to show more about how I use random tools to accomplish super-repeatable layout without ever reaching for a ruler. I made 35 marks from just one side of the board with the tools below.
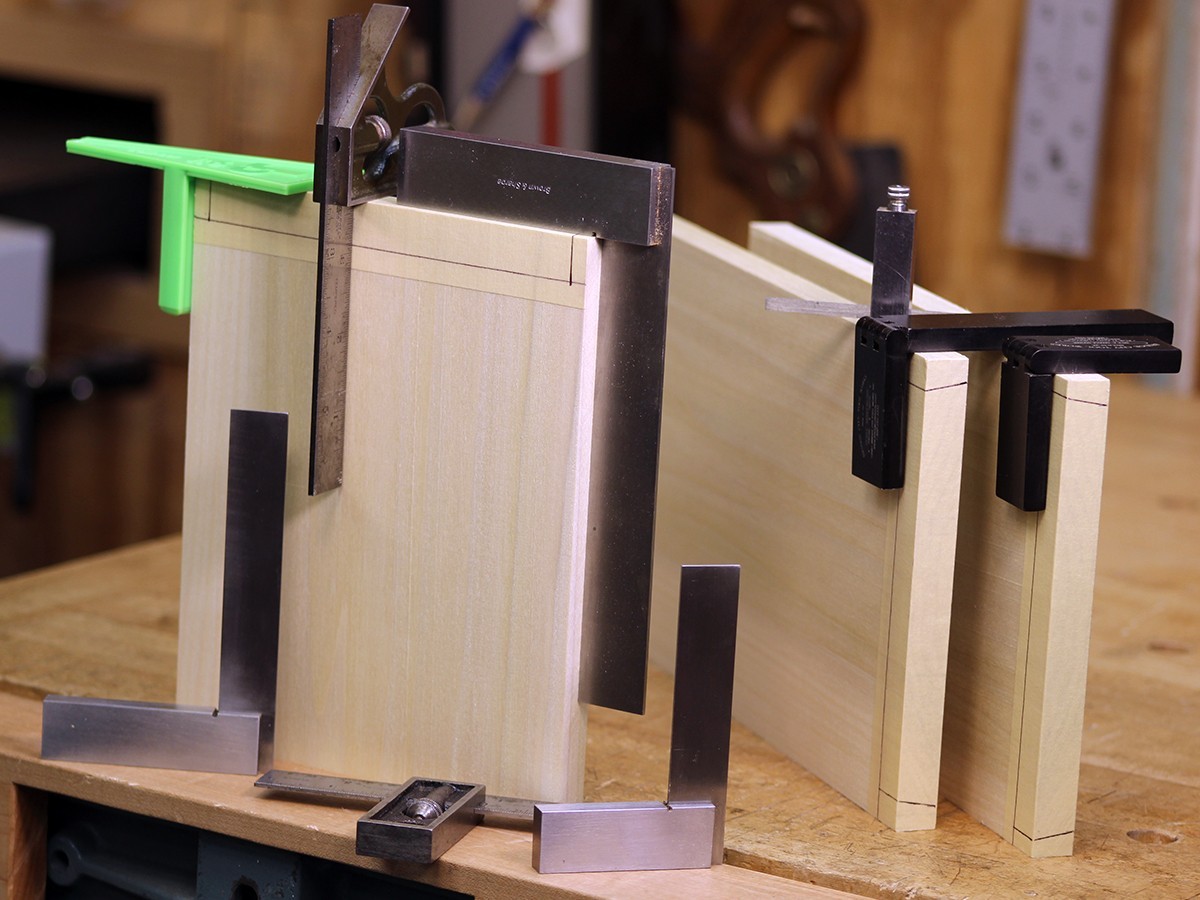

The edges on the tools in the first photo made the 35 marks in the second photo. Talk about options!!
I tried seven variations and settled on a top 3 for an overnight brain-soak. In the morning I get a “first impression” as I walk past the bench on the way to the office. By lunchtime I’ll make a decision.
In this next photo, there are 7 variations out of a possible Gazillion:
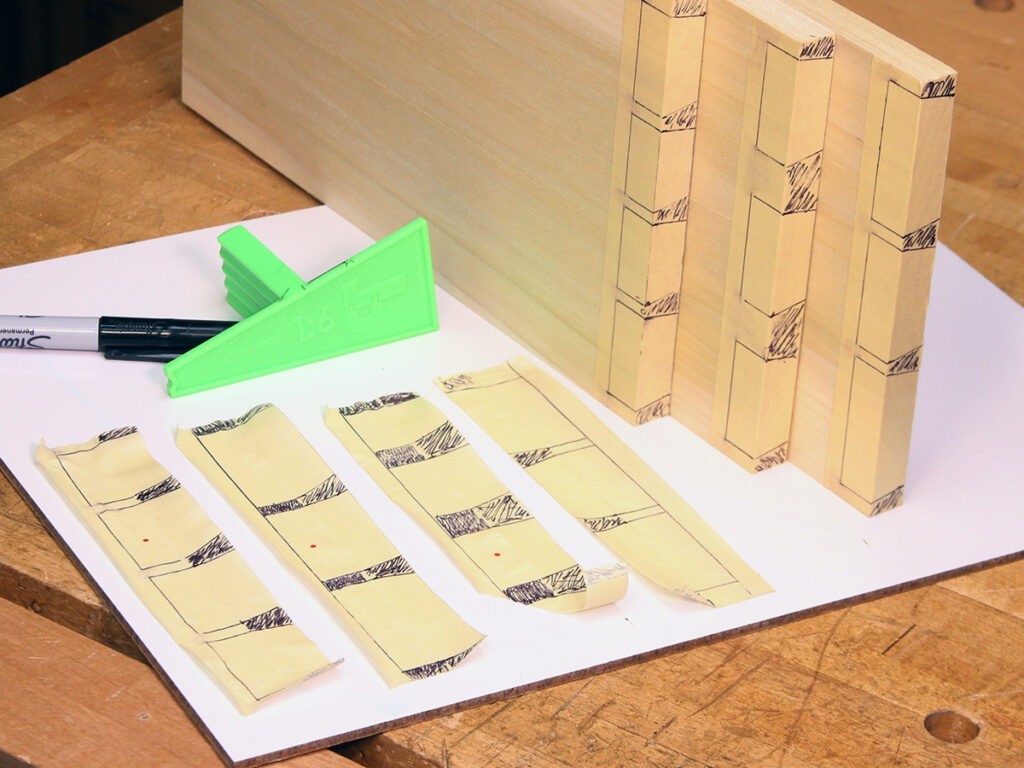
There are some with four tails and others with three. The look of the joint varies tons with small changes. The width of the pins can make a huge difference. Some makers like the London Pattern dovetail where the thinnest part of the pin is only the width of the saw kerf. I tried them once and I’m not a fan. The pins are prone to breakage and are so thin that all fitting must be done on the tails board, and it is difficult to work inside a saw kerf.
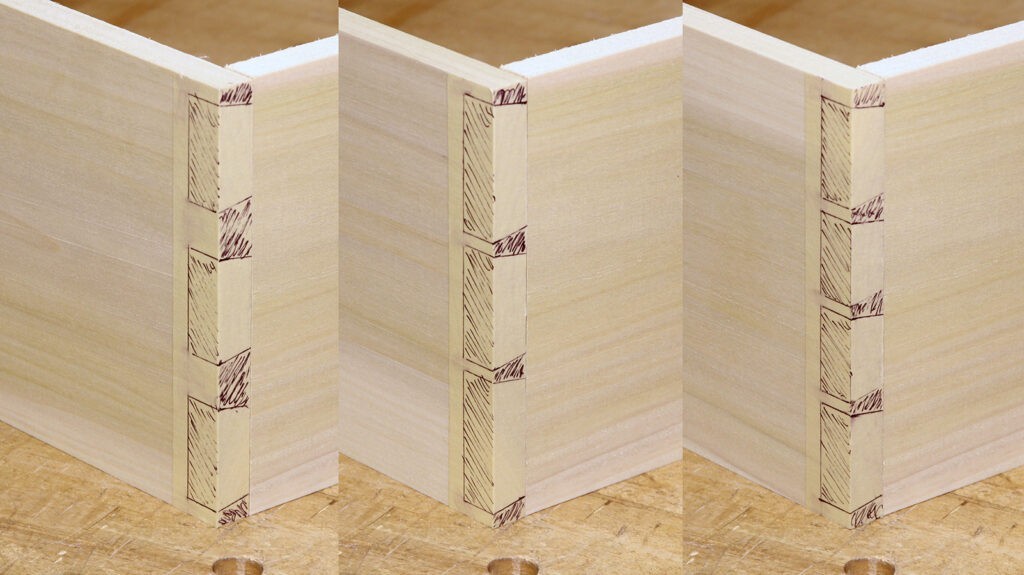
Take another board and form a corner to get a real look at what the joint will look like. Notice that I erased parts of the baseline to make the illusion better. The tape almost disappears when working with lighter woods.
TIP: Alcohol on a Q-tip cleans sharpie lines with ease.
Using tape on the edge lets me refine my layout until I make a final choice. I am leaning towards four tails not quite evenly spaced. If you squint at the photo, the joint looks like it has already been cut and fit. I’m a big fan of tape for visualization. I like knowing that the end result will be easy on the eyes.
There are infinite options for dovetail layout. Your project’s end use and how you’d like it to look will guide you to good decisions. Have a look at our recent post How TailSpin Marking Gauges Compare To Traditional Dovetail Layout Methods and see how laying out and marking your dovetails can be faster, easier, and more accurate while working towards that next level of craftsmanship we all aspire to.
- 2026’s Best Dovetail Marking Tool - November 12, 2025
- From Boxes to Cases: Real‑World Benefits of Collinear Marking & How to Use It - November 7, 2025
- Inside the Innovation: How Calibrated Collinear Marking Works - November 5, 2025
Trackbacks/Pingbacks